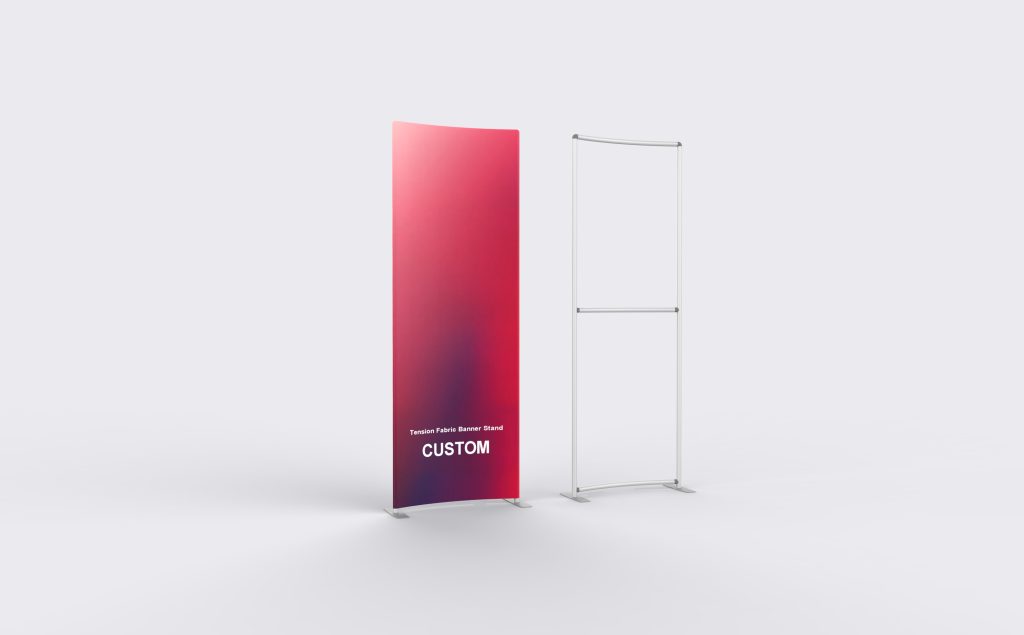
W7 Tension Fabric Banner Stand
An upright fabric banner with a broad message area and separate floor supports. Use the W7 model reference when requesting the stand or a replacement graphic, and position the main message for the visitor approach beside a counter or demonstration.
Use the front and side drawing for the selected W7 frame when preparing artwork. The model name does not specify an exact bend, finished height or floor depth.
W7 frame outline
Match the graphic to the selected W7 frame outline. Keep the upper edge and fitting allowances visible on the template so essential content stays within the readable area.
Upright message area
Keep the company name, offer and principal image together on the broad face visitors approach.
Separate floor feet
The supports extend beyond the fabric face. Include their full depth when planning the display position.
Frame, footprint and print configuration
| Product format | Portable tension fabric banner stand |
|---|---|
| W7 profile | Upright fabric banner; finished profile identified on the selected frame drawing |
| Support layout | Separate feet beneath the frame, with horizontal frame members |
| Finished size | Dimensions and fitting details on the approved order drawing |
| Space to allow | Overall frame width and depth, including any profile projection and the complete floor supports |
| Artwork basis | Matching W7 pattern, selected visible faces, print direction and fitting openings |
| Listed configuration items | White Back; Soft Bag |
Design for the visible graphic area
One clear message on the front
For a product demonstration, place the product name or benefit above the counter line. At reception, keep the welcome or directional message visible from the approach. Avoid filling the lower panel with details that furniture will conceal.
Keep the edge clear
Extend background color through the template’s finishing area. Keep logos, QR codes and small text inside the safe area so the edge fitting does not interrupt details that visitors need to read.
Review the assembled view
Prepare the artwork on the matching W7 pattern. Check the front/rear orientation, selected printed faces, edges and fitting openings against the frame view before approving the print file.
Choose the parts for your display
The existing configuration lists White Back and Soft Bag. Additional listed options are:
- Frame Only
- Replacement Fabric Graphic
- LED Display Lights (2 pack)
- TV/Monitor Mount
Identify each required component on the quotation. If you already own a frame, match the replacement fabric to its curve and dimensions. Lighting and screen hardware need their own fitting check.
Before choosing your W7
Does W7 mean a seven-foot banner?
W7 is the model reference. Order by the required finished width and height, then confirm the complete footprint and upper profile on the drawing. The model name alone does not establish a seven-foot size.
Where should the main headline sit on this shape?
Place the headline on the broad face above the counter or product in front of the stand. Check it against the selected W7 outline and template safe area. Keep supporting text closer to the main image so visitors can read the message from one approach.
Will it fit immediately behind a reception counter?
Measure the full support footprint and check the selected frame profile against the counter. Keep the feet outside the staff access route, and place the important artwork above the counter line. The front graphic width alone does not show whether the base will fit.
Can I order a new fabric graphic for an existing W7 frame?
Replacement Fabric Graphic is listed as an option. Send the original order number, finished dimensions and clear front, side and fitting photos. These identify the existing W7 frame more reliably than the model name alone and help avoid a replacement intended for a different outline.
Can lights or a monitor be added to this frame?
LED Display Lights (2 pack) and TV/Monitor Mount appear in the options list. Include the equipment size, weight and desired mounting position so the attachment can be checked for this frame. Their listing does not establish a load rating or mean they are included in the base configuration.
What happens between artwork approval and delivery?
Production follows the approved configuration and artwork. Milin sends photos and video of the completed order for confirmation before dispatch. Provide the delivery destination and event date when requesting a schedule; allow time for production and transport separately. Video guidance is available if assembly help is needed.