Slope-Top Fabric Banner Stand
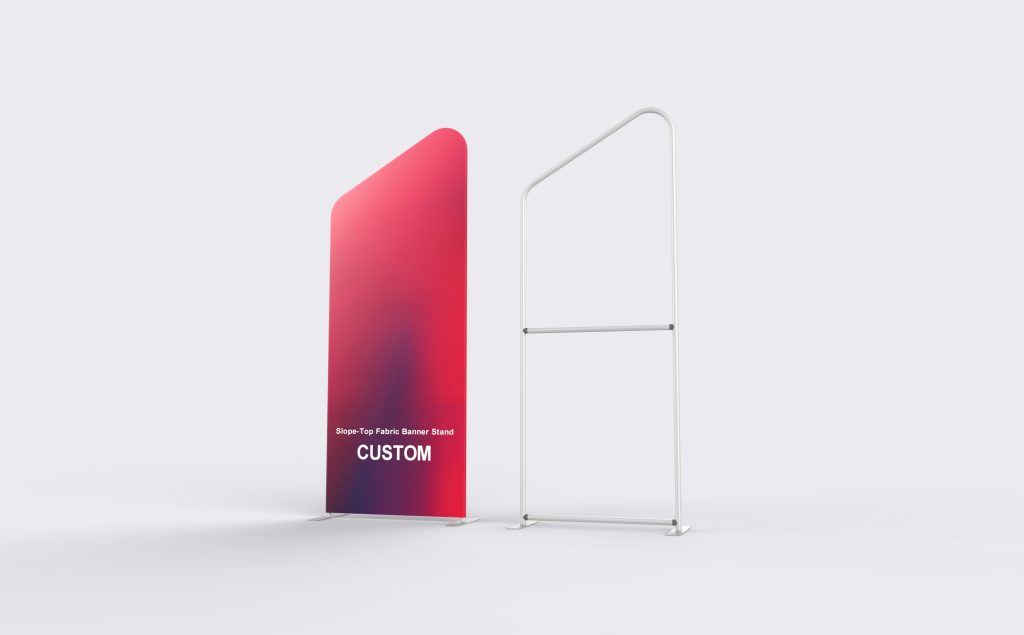
A freestanding fabric sign with a sloping top and rounded corners. The diagonal outline gives a campaign graphic a distinct silhouette while leaving the broad upright face for the product name, image and offer.
Viewed from the front, the illustrated top rises from left to right. Label that direction on the artwork and keep the headline level below the lower end, leaving the taller corner for background imagery.
Place the headline below the slope
Give the headline a level baseline
Keep the main wording below the low end of the top edge. This prevents letters from running into the slope and gives the complete headline a clear reading area.
Use the taller corner for the visual
A background color, crop of a product image or broad graphic can extend into the higher area. Keep logos and small text away from the rounded corner and fitted edge.
Match the fabric to this frame
Mark the front, high side and low side on the Slope-Top template. Keep each selected face identified through print approval; a mirrored graphic can put the composition on the wrong side of the fixed frame outline.
Beside a product display
Position the main message above the part that a sample, shelf or counter will conceal. Check the complete stand from the visitor’s approach before finalizing the image and text placement.
Within an exhibition layout
Allow room for both feet rather than measuring only the fabric width. Keep the supports within the assigned display space and clear of the route visitors and staff use.
Dimensions and construction
| Product format | Portable freestanding fabric sign |
|---|---|
| Top profile | Sloping upper edge with rounded corners and unequal side heights |
| Frame reference | Perimeter frame, horizontal crossbar and separate floor feet |
| Catalog size labels | 3 ft across the top of the illustration; 7.5 ft on the tall side |
| Order dimensions | Finished width, high-side height, low-side height and full support footprint on the approved drawing |
| Graphic layout | Slope-top pattern matched to the selected orientation, visible faces and fitting openings |
| Included items | White Back; Soft Bag |
Frame, graphics and accessories
White Back and Soft Bag are listed with this configuration. Additional choices are:
- Frame Only
- Replacement Fabric Graphic
- LED Display Lights (2 pack)
- TV/Monitor Mount
Keep the matching frame dimensions and artwork for a later graphic change. Specify any lighting or screen hardware separately, including its fitting requirements.
Questions about the sloping top
How much of the face can I use for a straight headline?
Keep the headline within the area below the lower end of the sloping top, with the template’s edge allowance. This gives a straight line of text room across the panel. The extra height on the taller side is better suited to background artwork or a separate visual element.
Can I use artwork made for a rectangular banner?
Reuse the logo, images and wording, then recompose them on the slope-top template. Keep a level headline below the low corner and let the background extend into the tall side. Check both the safe area and rounded corners before approving the artwork.
Which way should the top slope?
The illustrated front rises from left to right. If you need the opposite orientation, show it on a front-view sketch and request a matching frame and graphic. Flipping the print file or turning the stand around does not by itself establish the same viewing face and finish.
Is this the same product as the Angled Top banner stand?
They are separate models. This Slope-Top reference has a diagonal upper edge and a perimeter frame with two side uprights. Compare the frame outline and supports of the Angled Top version before ordering; the covers and dimensions should not be assumed interchangeable.
Can I add lights or a monitor?
LED Display Lights (2 pack) and TV/Monitor Mount are listed options. Supply the equipment dimensions, weight and intended mounting location so its fitting can be reviewed for the slope-top frame. The options list does not state a load rating or confirm that hardware is part of the base set.
What should I confirm before dispatch?
Review the approved front view, high and low dimensions, printed-side orientation and selected components. Milin sends photos and video of the completed order for confirmation before dispatch. Provide the destination and event date for production and transport planning; video assembly guidance is available if needed.