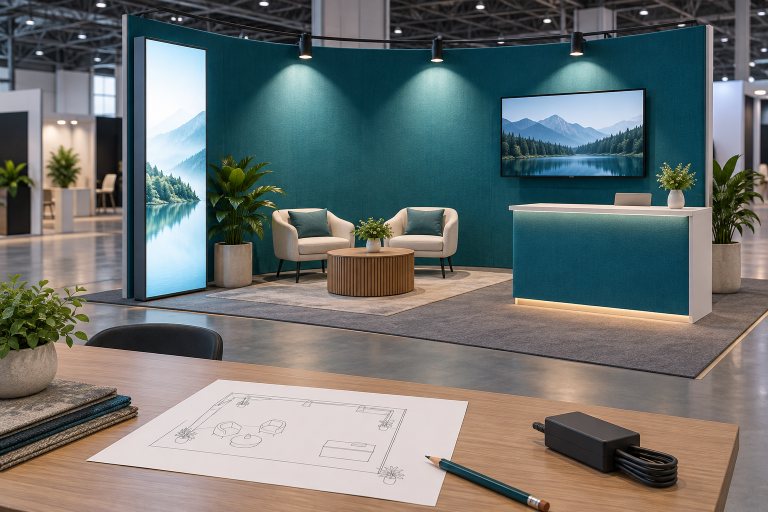
To pack an exhibition booth safely, inventory and label every part, separate heavy frames from graphics and electronics, use the right crate or case for each item, block all movement, and record the final weight, dimensions and contents. Check batteries, wood packaging, customs documents and the return plan before the shipment leaves.
A reusable booth may contain aluminum frames, SEG graphics, lightboxes, counters, screens, flooring, furniture, cables and hundreds of small fittings. These parts fail in different ways: frames bend, panels scratch, fabric traps moisture, screens crack and loose hardware disappears. Pack each item according to its material, weight and risk instead of trying to place everything in the fewest crates.
Plan Before Dismantling
Confirm the packing and return plan before the event closes. Move-out periods are often short, and missing crates, late vehicles or unclear customs papers can delay the whole shipment.
Prepare:
- A component inventory and crate list
- Assembly and dismantling drawings
- Previous packing photos
- The freight collection time and vehicle details
- The warehouse or venue delivery booking
- Customs and temporary-import documents
- A dangerous-goods check
- A return-shipping plan
- Contacts for the booth manager, packer, carrier, broker and receiver
Give one person authority to check the final package count and stop the shipment when an item is missing, a crate is unsafe or a regulated product has not been reviewed. For a large booth, separate responsibility for dismantling, packing, transport, customs and warehouse receiving.
Plan backward from the collection deadline. Allow time for dismantling, cleaning, drying, inspection, packing, weighing, document checks and vehicle loading. Do not book the truck for a time that leaves no room to correct a missing part or damaged package.
Create a Clear Inventory
Do not describe the entire shipment as “booth equipment.” Give each important component a code and use the same code on the item, protective bag, crate list, drawing and photograph.
Typical groups include:
- Structure: aluminum frames, steel supports, wall panels, doors, counters, cabinets, floor modules and ramps
- Graphics: SEG fabric, tension fabric, rigid graphics, acrylic signs and lightbox graphics
- Electrical equipment: screens, media players, lights, power supplies, cables, chargers and batteries
- Furniture: tables, chairs, stools, shelves and product displays
- Hardware: bolts, washers, brackets, connectors, keys and tools
A simple code system may use FR for frames, PN for panels, GR for graphics, EL for electrical items and HW for hardware. For example, GR-03 may identify the rear fabric graphic and HW-05 the hardware set for a counter.
For valuable or safety-related items, also record the brand, model, serial number, quantity, dimensions, weight, condition, country of origin, package number and matching accessories. Record connected parts as a set. A screen without its bracket or a lightbox without its power supply may be unusable even when the main item arrives.
Use Different Records for Different Jobs
The internal inventory, packing list and customs documents should match, but they serve different purposes:
- Internal inventory: asset code, location, condition, repair history and company value
- Package packing list: the exact contents of each crate, case, pallet or carton
- Customs invoice or declaration: item descriptions, quantities, values, origin and tariff classification
- ATA Carnet general list: the specific temporary-import goods covered by the Carnet
Do not update only one document after moving an item between packages. The crate label, packing list and customs papers must all show the same package number and quantity.
Photograph the Booth and Its Condition
Create one photo record that follows the booth from dismantling to delivery. For each high-value or complicated item, keep at least four useful photographs:
- A full view of the item
- The item code or serial number
- Any existing damage
- The final supported position inside the package
Also photograph the complete booth before dismantling, graphic positions, cable routes, hidden brackets, the closed package, labels, seals and the secured load inside the vehicle or container. At delivery, photograph visible package damage before moving or opening the cargo.
Use file names that match the item code, such as SC-02-before-packing and SC-02-inside-case. Store the files in shared project storage, not only on one employee’s phone. Keep the records until the transport, storage and insurance claim periods have ended. For a reusable booth, keeping them through the next completed installation is a practical minimum.
Inspect and Separate Damaged Parts
Inspect components while connections and surfaces are still visible. Check for bent frames, cracked panels, loose locks, torn graphics, swollen boards, frayed cables, burn marks, corrosion, damaged lifting points and missing fittings.
Use four condition labels:
- Ready to reuse
- Repair before reuse
- Replace
- Do not use until inspected
Remove damaged lifting and rigging parts from normal stock. In the United States, OSHA requires defective rigging equipment to be removed from service and requires legible identification markings on covered equipment.[1]
Record the item code, damage, photo number, required repair, responsible person and deadline. Do not close an unrecorded damaged part inside a crate, because it will be difficult to prove when the damage occurred.
Clean and Dry Everything
Remove dust, tape, adhesive residue, grease, food, metal shavings and old labels. Use cleaners approved for the material. Test an unfamiliar cleaner on a hidden area and stop if it causes color transfer, softening, loss of gloss or print lifting.
Do not pack damp fabric, wet carpet, recently washed panels or moisture-contaminated foam and cardboard. Check folded fabric, carpet backing, cabinet corners, panel edges and hollow frame sections. Trapped moisture can cause mold, odor, corrosion, swelling, delamination and adhesive failure.
Allow screens, lights and power supplies to cool before wrapping. Desiccant can control remaining moisture inside a properly sealed package, but it cannot correct a wet item or wet crate.
Choose the Right Package
Select packaging by weight, fragility, value, shape, transport mode, weather exposure and expected number of reuses. A reusable aluminum exhibition booth normally needs several package types rather than one general crate.
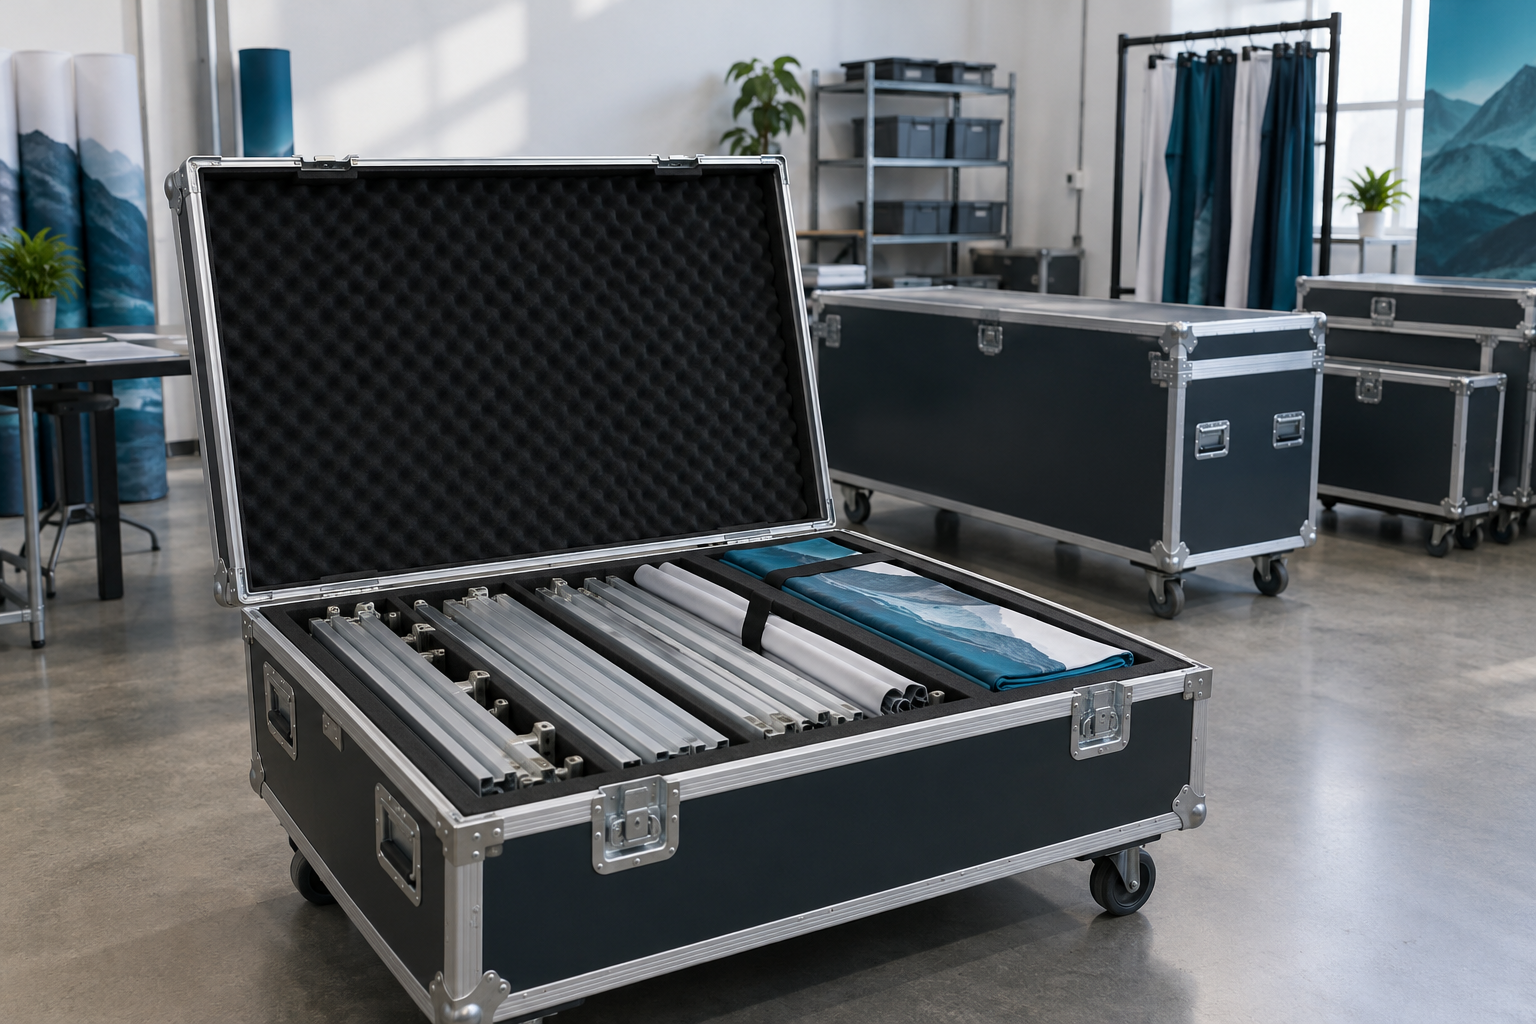
Wooden crates suit frames, panels, counters and large modules. The base must carry the full load. Add forklift access, internal supports, smooth inner surfaces, strong corners and screws or latches that allow repeated opening.
Flight cases suit screens, media players, lighting controls, cameras and high-value tools. Use fitted protection so the equipment cannot move when the case is tilted.
Pallets suit items that can be supported and secured as one stable load. Palletized cargo does not automatically become stackable. A screen or acrylic panel may be fixed to a pallet but still require a Do Not Stack instruction.
Heavy-duty cartons suit lightweight accessories and soft goods. Reject damp, crushed or bulging cartons.
Rigid tubes suit graphics that the print supplier allows to be rolled. Use a wide core, smooth interior, secure end caps and full-length support.
Match Packaging to the Transport Mode
Air freight: check chargeable weight, airline size limits, battery rules, transfer points and terminal handling. Large lightweight crates can be expensive because air freight may be charged by volume.
Sea freight: check container door dimensions, internal dimensions, floor condition, cargo weight, humidity risk and whether the cargo will use a full or shared container. Shared-container freight may be handled more often.
Road freight: check vehicle dimensions, tail-lift capacity, loading-dock access, transfer terminals, border requirements and delivery windows. Do not assume the same vehicle will carry the shipment for the whole route.
Pack Frames, Panels and Counters
Group frames by booth area and separate finished surfaces with clean, soft dividers. Protect corners, locking points, connector pins, threaded holes and adjustable feet. Support long profiles at several points so they do not bend.
Block frames against forward, backward, sideways and upward movement. Do not rely on a tight-looking crate. Parts settle during transport and can create space after loading.
Support flat panels over a broad area and protect all edges. Place a smooth non-abrasive sheet against painted, laminated or printed faces. Do not put heavy hardware boxes on top of panels.
Remove or secure counter shelves, doors, drawers and adjustable feet. Attach the labeled hardware bag to the correct panel where safe. Never lock a counter if the only key is inside it.
Pack Fabric and Rigid Graphics
Follow the print supplier’s instructions because some graphics can be folded while others should be rolled.
When folding is approved, use large loose folds and keep the graphic above heavy items. When rolling is approved, use a clean wide core and avoid excessive tension. Do not use rubber bands, which can leave pressure marks.
Do not sharply crease silicone edges. Label the graphic code, frame number, top edge, front side and orientation. A tension fabric backdrop booth should be stored as linked frame-and-graphic sets even when the fabric and aluminum are packed separately.
Place rigid graphics between smooth sheets with corner and edge protection. Keep printed faces away from raw timber, rough cardboard, exposed screws and loose metal parts.
Pack Lightboxes, Screens and Electronics
Separate lightbox frames, graphics, power supplies and cables, but keep their codes linked. For a modular lightbox exhibition booth, protect LED strips, connectors and power sockets from pressure by frame parts.
Use the original screen packaging only when it is dry, complete and still strong enough for the route. Otherwise, use a fitted flight case.
Before packing a screen:
- Switch it off and disconnect power.
- Allow it to cool.
- Remove detachable stands and brackets.
- Label every cable.
- Protect ports and the screen face.
- Record the serial number and test result.
- Back up settings and content.
- Secure the unit inside the case.
Test screens, media players and powered lightboxes at least twice in a normal reuse cycle: once before packing and again before dispatch after long-term storage. Record whether each unit powers on, accepts the correct input and uses the correct power supply.
Do not place pressure on the center of a screen or store it face-down under other equipment. Large modular systems such as a mobile LED screen wall also need separate records for modules, processors, power distribution and spare parts.
After equipment moves from a cold vehicle into a warm, humid venue, allow condensation to clear before switching it on.
Pack Lighting, Cables and Hardware
Allow lights to cool and protect lenses, brackets, connectors, fans and control surfaces. Check whether a fixture contains an internal battery.
Label cables at both ends with the cable number, start point, end point and equipment code. Coil them loosely and use hook-and-loop straps rather than adhesive tape. Separate power, data, video, audio and lighting cables.
Use one labeled hardware bag or compartment for each booth section. Each package should show the hardware code, booth area, quantity and required tool. Do not mix hardware from different installation areas unless the parts are identical and clearly counted.
For standard bolts, washers and clips, preparing about 5% to 10% more than the exact assembly quantity is a useful project rule. For proprietary connectors that may be difficult to buy locally, carry at least one or two complete spare sets. Adjust these figures for the booth size, route and replacement availability.
Prepare an Open-First Case
Pack one case that the installation team can reach first. Include assembly drawings, the crate list, hardware list, basic hand tools, tape measure, level, gloves, cleaning cloths, spare connectors and contact details.
Mark it “OPEN FIRST — INSTALLATION TOOLS AND DOCUMENTS.” Check the case for restricted items such as battery tools, aerosols, blades, paint, adhesives and solvents before shipping.
Check Batteries and Other Dangerous Goods
Review lithium batteries, power banks, battery tools, aerosols, paint, adhesives, cleaning chemicals, gas cylinders, refrigerants, dry ice, strong magnets and product samples before the carrier collects the freight.
For lithium batteries, collect the chemistry, watt-hour rating, quantity, condition, equipment model, packing method and UN 38.3 test-summary information. Do not guess from the product name.
From 1 January 2026, lithium-ion batteries packed with the equipment they power under IATA Packing Instruction 966 generally must be offered for air transport at no more than 30% state of charge. For batteries contained in equipment under Packing Instruction 967, IATA strongly recommends, rather than universally requires, a state of charge of no more than 30%.[2]
Do not include swollen, leaking, recalled or safety-defective batteries in a normal air shipment. Batteries that may produce dangerous heat, fire or short circuit are forbidden for air transport unless a specific authority-approved exception applies.[3]
Ask a trained dangerous-goods specialist and the carrier to review the shipment. A label such as “water-based” or “household cleaner” does not prove that a liquid is unrestricted. When practical, buy ordinary paint, cleaner and adhesive at the destination.
Control Moisture During Shipping
Before loading a container, check the floor, roof, doors and seals. Do not use a unit with water entry, strong chemical odor, damaged flooring or cargo residue until it has been cleared.
Keep graphics and electronics above the floor and away from container walls. Use a suitable moisture barrier, anti-static protection and correctly sized desiccant for valuable electronics. Protect bare metal from moisture and salty residue.
Base the desiccant amount on the enclosed volume, barrier material, route and storage time. More desiccant is not a substitute for dry goods and a properly sealed package.
Check Wood Packaging Rules
International shipments may be subject to ISPM 15 rules for raw solid-wood crates, pallets, skids, braces, blocks and dunnage. Regulated wood must use an approved treatment and carry the required mark. Packaging made entirely from qualifying processed wood, such as plywood or oriented strand board, is excluded, but solid-wood skids or repair pieces within the same package still need checking.[4]
Check the complete package, not only the pallet base. Do not cover the treatment mark or repair a compliant crate with unmarked raw timber. Confirm destination and transit-country requirements before construction or repair.
Label, Measure and Weigh Every Package
Give each completed unit a unique number, such as Crate 1 of 7 or Case 2 of 7. Place the main internal destination label on at least two visible sides where practical, and keep one spare copy in the document pouch in case an external label is damaged. Follow separate carrier, customs and dangerous-goods labeling rules.
Include:
- Exhibitor and event name
- Booth number and destination
- Delivery contact
- Package number
- Gross weight and dimensions
- Short contents description
- Return address
- Necessary handling marks
Use handling marks only when they describe a real need: Keep Dry, Do Not Stack, Forklift Here, Heavy Item or Center of Gravity. A label does not make a weak crate safe.
Measure and weigh the finished package. Unless the carrier requires a different format, record dimensions to the nearest centimetre and gross weight to the nearest kilogram. Reweigh after adding, removing or moving any item.
A completed record may read: “Crate 3 of 8 — aluminum frame sections and two wall panels — 218 × 108 × 142 cm — net contents weight 315 kg — gross weight 405 kg.” This is a record example, not a standard crate size or weight limit.
Tell the carrier when a package cannot be tilted, requires long forks, has an offset center of gravity or exceeds normal door and dock limits.
Secure the Cargo Twice
First stop items moving inside each package. Then stop the completed packages moving inside the vehicle or container.
Inside crates, use fitted dividers, blocking, brackets, straps, anti-slip material and load-appropriate foam. Do not use loose waste cardboard as the main support for a heavy part.
Inside the vehicle or container, keep heavy cargo low, spread weight across the floor, use rated securing points, protect straps from sharp edges and prevent sliding, tipping and vertical movement. The IMO/ILO/UNECE CTU Code provides international guidance for safe packing and securing in containers, vehicles and other cargo transport units.[5]
Photograph the final package positions, straps, blocking, vehicle or container number and seal before the doors close.
Prepare Clear Customs Documents
International exhibition shipments may require a commercial or pro forma invoice, packing list, export and import declarations, transport document, HS codes, origin details, temporary-import papers, dangerous-goods documents and insurance records.
Use specific descriptions such as “reusable aluminum exhibition frame,” “printed polyester fabric graphic,” “LED monitor with bracket” and “wooden display counter.” Avoid “marketing material,” “booth items” and “various equipment.”
The Harmonized System classifies goods internationally at the six-digit level, while national tariffs may add more digits. A booth containing frames, furniture, electronics and printed graphics may require more than one classification.[6]
Do not declare a value of zero just because the booth is not being sold. The WCO explains that customs valuation first uses transaction value when the legal conditions apply, followed by other valuation methods when they do not. Temporary exhibition goods should therefore have a supportable value agreed with the customs broker.[7]
Keep reusable booth equipment separate from brochures, gifts, food, samples given away, sold goods, consumables and locally purchased materials. Confirm who is responsible for duties, guarantees, re-export evidence and closing the temporary-import procedure.
Use an ATA Carnet Carefully
An ATA Carnet can simplify duty- and tax-free temporary import for eligible exhibition equipment in participating countries and customs territories. ICC states that a Carnet can cover temporary import for up to one year, but the holder must still meet the customs deadlines and conditions applied to the actual trip.[8]
The general list should identify the goods clearly by description, quantity, weight, value, serial number and origin where required. Keep Carnet goods separate from giveaways, consumables and goods intended for sale. The same listed goods must be correctly presented for re-export unless customs approves another procedure.
Digital ATA Carnet processing began its wider rollout on 1 June 2026 in 30 countries: the 27 EU member states, Norway, Switzerland and the United Kingdom. Other customs territories are moving to the digital system in stages, and paper and digital procedures may coexist during the transition. Confirm the required format for every destination and transit point before departure.[9]
Arrange Insurance and Keep Evidence
Carrier liability may be lower than the booth’s replacement cost. Check whether cargo insurance covers dismantling, packing, collection, terminals, customs inspection, temporary storage, venue handling, final delivery and return transport.
Review the insured value, deductible, exclusions, geographic limits, electronics conditions, water-damage terms and claim deadlines. Keep purchase records, serial numbers, condition reports, packing photos, delivery notes and damaged packaging until the claim period ends.
Store the Booth Safely
Use a dry, secure warehouse with suitable roof condition, flood protection, pest control, fire protection, forklift capacity, door size and floor loading.
Keep packages above the floor where practical and away from outside walls, drains, loading doors and known leak areas. Do not stack crates unless they were designed for it.
For a dry indoor warehouse, checking long-term booth storage every three months is a practical starting point, not a universal rule. Inspect more often where humidity, leaks, flooding, outdoor walls or large temperature changes create extra risk.
During each inspection:
- Check fabric for mold, odor and permanent creases.
- Check metal for condensation and corrosion.
- Check wood-based panels for swelling and warping.
- Check acrylic for scratches, heat distortion and aging film.
- Remove batteries where the manufacturer allows it.
- Test valuable electronics before the next event.
- Record every crate opening and item movement.
Control Warehouse and Venue Handover
Count packages before the driver leaves. Check wet areas, broken seals, punctures, crushed corners, unstable loads and forklift damage. If internal inspection cannot happen immediately, state that the receipt covers external package condition only.
Before venue delivery, confirm the advance warehouse or direct-to-site address, delivery window, dock height, freight-elevator size, maximum package limits, forklift booking, official-contractor rules, empty-crate storage and move-out deadline.
Send the installation team the crate list, assembly drawings, delivery schedule, damage-report process and contact details. Keep the open-first case out of remote storage.
Prepare the Return Shipment Early
Confirm the return carrier, collection time, repacking team, empty-crate location, customs broker, warehouse and re-export process before the event opens.
Keep custom foam, dividers, tubes, bags and supports. During move-out, compare every item with the inventory, count hardware, record damage, separate waste and rentals, review batteries and chemicals, and update the packing list to match the actual return contents.
Do not assume that carrier collection closes a temporary-import or ATA Carnet procedure. Keep the customs exit or re-export evidence required for the route.
Final Dispatch Check
A practical final check should cover four areas: safety, packaging, documents and delivery.
- Safety: damaged structural parts are separated, regulated goods are reviewed, and every package can be handled by the available equipment.
- Packaging: all items are clean and dry, graphics and electronics are protected, hardware is counted, and nothing can move.
- Documents: labels, weights, dimensions, packing lists, customs descriptions, values and package numbers match.
- Delivery: insurance, carrier collection, warehouse or venue booking, receiving contacts and return arrangements are confirmed.
Stop the shipment when the package count is wrong, a battery or chemical remains unclassified, the goods do not match the customs papers, a heavy crate cannot be handled safely, a safety-critical part is damaged or the packaging is wet or structurally weak.
Conclusion
A reliable booth shipment depends on four controls: identity, protection, records and responsibility. Give every major part a code, keep heavy frames away from graphics and electronics, and prepare 5% to 10% spare standard fasteners. Take at least four useful photos of valuable items, label two sides of every package and record dimensions to 1 cm and weight to 1 kg where the carrier allows. Check long-term storage about every three months as a starting point. Before dispatch, confirm batteries, solid-wood packaging, customs values, insurance and return documents. These checks reduce missing parts, damage, border delays and installation problems.