To choose a reliable exhibition stand manufacturer in China, compare at least three suppliers and check the legal company, technical drawings, materials, trial assembly, inspection, packing, and delivery plan before paying the balance. Compare the full cost of getting the stand to the venue, not only the factory price.
Buying from China usually works best when the stand will be reused, the structure can be divided into modules, and the project starts early enough for production, shipping, customs, and corrections. For a one-time booth with heavy wood construction or a short deadline, local rental may cost less.
A practical middle option is to buy reusable frames, fabric graphics, and lightboxes from China, then rent flooring, furniture, rigging, internet, and labor near the venue. Buyers can compare the main types of exhibition display systems before deciding which parts are worth shipping internationally.

When Buying from China Makes Sense
Buying an exhibition stand from China is more suitable when:
- The stand will be used at three or more events.
- The design uses reusable aluminum frames and replaceable graphics.
- The same parts can support more than one booth layout.
- Production and freight can begin several months before the show.
- A local installation team is available.
- Replacement graphics and spare parts will be needed later.
- The savings remain meaningful after freight, customs, labor, storage, and repairs are included.
Local rental may be more practical when:
- The stand is required for only one event.
- Most of the structure will be built from wood and discarded.
- The venue requires an official local contractor.
- The delivery deadline is too close for international production.
- The buyer has no reliable importer, freight forwarder, or installation team.
- The packed volume is so large that freight removes the factory-price advantage.
Do not assume that buying becomes cheaper after a fixed number of events. Calculate the total cost for the actual planned uses. A compact modular booth may become economical after several shows, while a large booth with expensive freight and storage may remain more costly than local rental.
Define the Project Before Asking for a Quote
Do not request a quotation using only the booth size and a reference image. The supplier cannot calculate an accurate price without knowing the layout, functions, product loads, electrical needs, destination, installation conditions, and expected number of uses.
Send the same information to every supplier:
- Trade show name, venue, city, booth number, and booth dimensions.
- Number of open sides and maximum permitted height.
- Move-in date, show-opening date, and required delivery date.
- Main products and services being promoted.
- Expected number of visitors inside the booth at one time.
- Meeting rooms, reception counters, storage rooms, and demonstration areas.
- Screen sizes, screen weights, and mounting positions.
- Lighting, internet, water, drainage, or compressed-air requirements.
- Available installation time and expected crew size.
- Expected number of future uses.
- Budget range.
For every displayed product, provide:
- Dimensions and weight.
- Quantity.
- Required shelf or counter load.
- Fixing method.
- Whether visitors will touch or operate it.
- Power, heat, data, water, or security requirements.
Send the complete exhibitor manual before the design is approved. It may contain rules for booth height, fire safety, electrical work, rigging, raised floors, glass, accessibility, storage rooms, floor loading, and installation hours.
Set a Realistic Project Schedule
The table below is a planning example for a normal modular booth project. It is not a fixed industry schedule. Large custom structures, special materials, public holidays, difficult approvals, or sea freight may require much more time.
| Project stage | Practical planning range |
|---|---|
| Supplier comparison and initial design | 1–3 weeks |
| Technical drawings and approval | 1–2 weeks |
| Materials and production | 3–6 weeks |
| Trial assembly and corrections | 1–2 weeks |
| Final inspection and packing | 3–7 working days |
| Freight and customs | Depends on route and transport method |
| On-site installation buffer | At least 1–2 working days where possible |
Plan backward from the date the installation crew needs the complete booth. Do not use the show-opening date as the main delivery deadline.
Set clear freeze dates for:
- Booth structure.
- Technical drawings.
- Screen models.
- Product loads.
- Materials and finishes.
- Graphic artwork.
- Production release.
Require 100% of changes made after production release to be recorded in a written change order. The change order should show the new price, revised delivery date, affected drawings, and whether another trial assembly is required.
Choose the Right Stand Type
| Stand type | Best for | Main limitations |
|---|---|---|
| Portable display | Small booths, short events, air shipment, simple setup | Limited height, storage, product loads, and design options |
| Modular stand | Repeated use, changing booth sizes, international shipping | Needs a clear parts plan and compatible replacement parts |
| Custom stand | Special shapes, heavy products, large brand spaces | Higher freight, labor, approval, storage, and disposal costs |
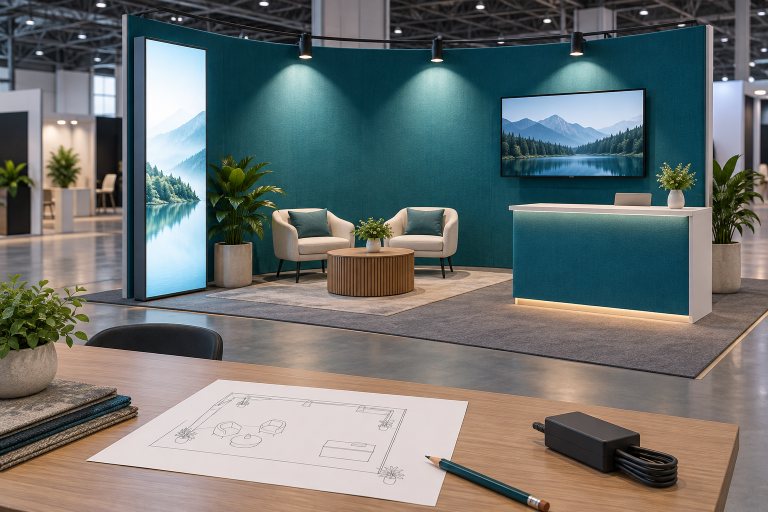
Portable displays include pop-up walls, folding counters, fabric backdrops, and compact lightboxes. They suit small spaces and short setup times. A tension fabric backdrop booth may be enough when the main need is a branded backwall rather than a complete booth structure.
Before buying a portable display, check:
- Packed length, width, and height.
- Net and gross weight.
- Number of cases.
- Number of installers required.
- Tools required.
- Graphic replacement method.
- Destination voltage and plug type.
“Portable” does not always mean that one person can carry or install the product. Large counters, lights, screens, and heavy cases may still require two people or handling equipment.
Modular stands normally use reusable aluminum profiles, SEG graphics, lightboxes, shelves, counters, doors, and screen brackets. A well-planned aluminum exhibition booth should allow a useful share of the same parts to be used in different layouts.
Custom stands may use wood, steel, acrylic, glass, raised floors, curved structures, or special finishes. They provide more design freedom but normally need more freight space, skilled labor, venue approval, and repair work.
For many overseas buyers, a reusable aluminum frame with a few custom elements gives a better balance between appearance, transport cost, and future use.
Measure Whether the Stand Is Reusable
Do not accept the word “modular” without a parts comparison. A booth is not meaningfully modular if most parts work in only one position.
Ask the supplier to show:
- The complete bill of materials for the main layout.
- Two or three alternative layouts.
- Which parts are reused.
- Which new parts and graphics are required.
- Which parts cannot be reused.
- Packed volume for each layout.
- Estimated setup time for each layout.
Structural reuse rate = reusable structural parts ÷ total structural parts × 100%
For example, if the main booth contains 100 structural parts and 75 can be used in the next layout, the structural reuse rate is 75%.
For planning purposes, a buyer may target a 60%–80% structural reuse rate for the next known layout. This is a project target, not a universal industry standard. The correct target depends on the booth sizes, design, products, and venue rules.
Replaceable graphics also improve reuse. The frame can remain in service while the campaign, language, or product message changes. This is the main idea behind interchangeable SEG fabric displays.
A stand may be technically reusable but still expensive to reuse if it needs:
- Factory engineers at every event.
- Special tools that local teams cannot replace.
- Large new graphics for every layout.
- High international freight costs.
- Difficult storage conditions.
- Frequent replacement of proprietary connectors.
Prepare a Clear RFQ
Compare at least three quotations using the same RFQ, drawings, and cost table. Two quotations are often not enough to show whether one supplier is expensive or another has simply excluded important work.
The RFQ should include:
- Dimensioned floor plan.
- Design brief.
- Technical requirements.
- Product weights and screen details.
- Exhibitor manual.
- Delivery address and deadline.
- Required Incoterm.
- Packing requirements.
- Inspection requirements.
- Warranty requirements.
Ask suppliers to price these items separately:
- Frame structure.
- Graphics.
- Lightboxes and electrical parts.
- Counters, doors, shelves, and screen brackets.
- Trial assembly.
- Transport cases and export packing.
- China inland freight.
- International freight and insurance.
- Customs clearance and final delivery.
- Installation and dismantling.
Require an exclusion and deviation list showing what is:
- Fully included.
- Partly included.
- Excluded.
- Optional.
- Replaced with another material or method.
Use a 15%–20% price difference as an internal review trigger. If one quotation is more than 15%–20% lower than comparable quotations, check whether it excludes graphics, lighting, cases, trial assembly, spare parts, freight, or destination services. This percentage is a buyer-control value, not proof that the quotation is wrong.
Verify the Supplier
A website and finished booth photographs do not prove that the company manufactured the project. The supplier may be a factory, design company, printer, trading company, or project manager.
Ask which work is completed in-house and which work is outsourced:
- Aluminum cutting and machining.
- Wood or metal fabrication.
- Graphic printing.
- Electrical assembly.
- Trial assembly.
- Inspection.
- Packing.
Check the legal company. Request the Chinese business license and verify the Chinese legal name, Unified Social Credit Code, registration status, address, legal representative, and business scope. Basic company information can be checked through China’s National Enterprise Credit Information Publicity System; the European Commission’s China IP Helpdesk explains how overseas companies can use the official records.[1]
Match the legal name against:
- Contract.
- Quotation.
- Commercial invoice.
- Bank beneficiary.
- Company stamp.
- Export documents.
If different company names appear, require a written explanation before payment.
Check the bank account. Stop and verify the payment when:
- The beneficiary is an individual.
- The beneficiary is an unrelated company.
- The account changes shortly before payment.
- The new instructions arrive only through chat or email.
- The sender creates unusual urgency.
The FBI recommends independently confirming changes to bank accounts or payment procedures, preferably by calling a previously known contact number.[2]
Check the factory. Request a live video walkthrough or an on-site visit. Ask to see:
- Factory entrance and company nameplate.
- Production areas.
- Material storage.
- Printing and electrical work.
- Trial-assembly area.
- Packing area.
- Current projects.
- Quality-control records.
Check whether the factory has enough clear space to assemble the complete booth and whether it has accepted too many projects for the required shipping date.
Test the technical team. Ask who is responsible for drawings, structure, electrical work, graphics, production, inspection, packing, shipping documents, and after-sales support.
Send three practical questions:
- How is the screen load supported?
- How can drivers and cables be reached after installation?
- How will a tall wall remain stable if floor fixing is not allowed?
“No problem” is not a technical answer. A capable supplier should ask for missing information and provide drawings, calculations, connection details, or clear assumptions.
Compare the Full Cost
The factory price is only one part of the project. Compare four cost groups.
| Cost group | Typical items |
|---|---|
| Factory cost | Frames, graphics, lights, counters, shelves, trial assembly, packing |
| Landed cost | China transport, export charges, freight, insurance, duties, taxes, final delivery |
| Show-site cost | Material handling, labor, electricians, rigging, internet, overtime, empty-case storage |
| Lifecycle cost | Storage, replacement graphics, repairs, lost parts, future freight, installation, disposal |
The following is a calculation example, not an industry price benchmark:
| Example cost | Amount |
|---|---|
| Factory quotation | US$30,000 |
| International freight and insurance | US$6,000 |
| Customs and local delivery | US$2,000 |
| Show-site labor and handling | US$9,000 |
| First-year storage and repairs | US$3,000 |
| Total first-year cost | US$50,000 |
In this example, the factory quotation represents 60% of the first-year cost. The exact percentage will differ greatly by project, destination, freight method, and venue fees.
When comparing purchase with rental, use the same number of expected events. Include:
- Initial purchase.
- Cost per show.
- Replacement graphics.
- Storage.
- Repairs.
- Freight.
- Installation.
- Remaining value after the final planned event.
Approve Drawings, Loads, and Materials
A rendering shows the appearance but not how the booth is built. Before production, request technical drawings showing:
- Overall dimensions and wall heights.
- Profile sizes and cross-sections.
- Connections, fasteners, feet, base plates, and bracing.
- Doors, counters, shelves, and storage areas.
- Screen supports.
- Lightbox depth.
- Cable routes and access panels.
- Part numbers.
Provide the actual weight of every screen, product, shelf load, door, lightbox, and overhead item. Ask the supplier to show how each load passes through the profiles, connectors, and base.
Do not accept material descriptions such as “premium aluminum” or “high-quality fabric.” The approved documents should state:
- Profile series, dimensions, wall thickness, and finish.
- Connector and fastener material.
- Panel thickness and finish.
- Fabric type and printing method.
- Countertop and shelf material.
- LED and power-supply models.
Approve physical samples for important finishes, fabrics, colors, laminates, acrylic, locks, handles, and lighting color temperature.
Do not allow unapproved substitutions. Every proposed change should explain:
- Original material.
- Replacement material.
- Reason for the change.
- Price effect.
- Schedule effect.
- Performance difference.
- Compliance documents.
Check Graphics and Lighting
Artwork should be prepared from the final production templates, not from a 3D rendering.
Approve:
- Visible size and full print size.
- Bleed and safe area.
- Graphic direction.
- Stitching and silicone-edge size.
- Frontlit or backlit material.
- Panel seams.
- File name and revision.
Before printing, check image resolution, fonts, linked images, spot colors, QR codes, logo position, panel direction, and revision number.
For important brand colors, approve a printed sample on the final material. The same color value can look different on backlit fabric, frontlit fabric, vinyl, acrylic, painted metal, and laminate.
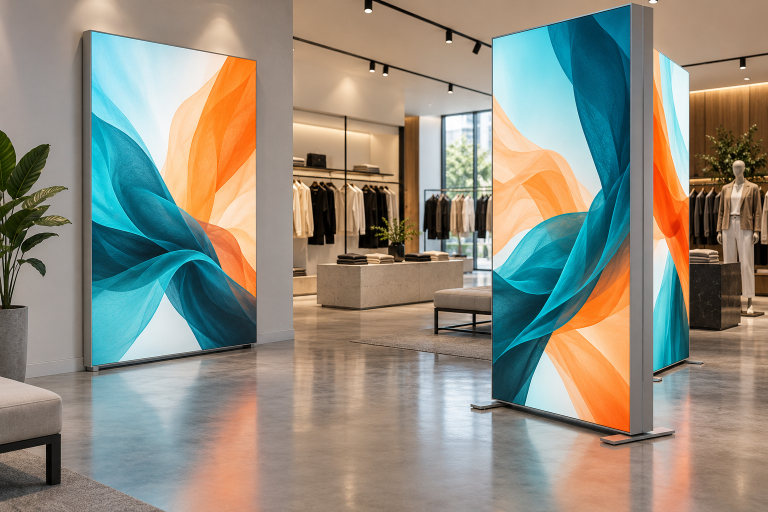
A lightbox should be checked as a complete system. The result depends on LED spacing, frame depth, fabric, internal bars, cable layout, heat, and graphic tension. Buyers can compare the construction of a SEG lightbox exhibition booth with the transport-focused design of portable SEG lightboxes.
Require 100% of custom lightboxes to be assembled and illuminated before packing. Check:
- Dark areas and bright spots.
- Shadows from internal bars.
- Light leakage.
- Flickering or driver noise.
- Color-temperature differences.
- Heat buildup.
- Access to drivers and cables.
Check Electrical Work and Compliance
The electrical schedule should show:
- Input voltage and frequency.
- Total wattage.
- Load per circuit.
- Driver locations.
- Switch locations.
- Cable types.
- Plug type.
- Grounding method.
- Spare drivers and LED modules.
Supplier-provided internal lighting should be tested at the factory. Connection to venue power must follow the venue’s rules and may need to be completed by an authorized local electrician.
For covered U.S. workplaces, OSHA requires electrical equipment to be approved and suitable for its intended installation and use.[3]
Compliance should be checked at three levels:
- Product requirements: lights, drivers, cables, fabrics, flooring, glass, and other supplied items.
- Venue rules: height, exits, raised floors, covered areas, storage, accessibility, electricity, and rigging.
- Project approval: drawings, calculations, test reports, insurance, and contractor documents.
A booth can use acceptable individual products and still fail venue approval because of its layout, height, covered area, exit route, or structural design.
Fire documents: Ask the organizer which reports it accepts for each fabric, panel, floor covering, and decorative material. Confirm that the report matches the actual manufacturer, model, material, finish, and printing process.
CE marking: CE marking only applies to products covered by EU rules that require it. It is not a general quality certificate for every exhibition stand.[4]
Check that declarations and technical documents match the exact supplied model. The manufacturer name, model, voltage, technical details, applicable rules, issue date, and signature should be consistent.
CE-marked components do not automatically make the completed product compliant. A company placing a final product on the EU market may need a Declaration of Conformity covering the complete product, even when individual components already carry CE marking.[5]
Accessibility: Keep routes, doors, counters, raised-floor edges, furniture, and cables from blocking visitor access. For U.S. projects, an accessible route generally requires at least 36 inches, or 915 mm, of clear width, subject to the detailed exceptions and layout rules in the ADA Standards.[6]
Control Drawings and Revisions
Every approved drawing should show:
- Project name.
- Drawing number.
- Revision number.
- Date.
- Scale.
- Units.
- Supplier.
- Approval status.
Use clear approval stages:
- Design approval: appearance, layout, visitor flow, and functions.
- Technical approval: dimensions, materials, structure, graphics, and electrical details.
- Production release: permission to begin manufacturing.
- Shipment release: confirmation that inspection, corrections, packing, and documents are complete.
Do not approve important changes through scattered chat messages. Require an updated drawing or signed change order.
A practical document priority is:
- Latest signed change orders.
- Signed contract.
- Approved technical drawings.
- Approved bill of materials.
- Approved physical samples.
- Approved graphic files.
- Final accepted quotation.
A later document should override an earlier document only for the items it clearly changes.
Run a Full Trial Assembly
Require a full trial assembly for custom, tall, illuminated, load-bearing, or reusable stands. A loose display of separate parts is not enough.
The trial assembly should cover 100% of the final:
- Frame structure.
- Custom graphics.
- Lightboxes.
- Counters.
- Doors and locks.
- Shelves.
- Screen supports.
- Supplier-provided internal electrical parts.
Use the final labeled parts, tools, instructions, graphics, and planned crew size.
Record:
- Crew size.
- Start and finish time.
- Tools used.
- Problems found.
- Parts changed.
- Final installation time.
After assembly, dismantle and repack the booth. Check whether parts are damaged, graphics can be removed safely, hardware is missing, and all components fit into the correct cases.
A reusable booth must survive assembly, dismantling, transport, storage, and another installation. One successful factory setup is not enough if the overseas team cannot rebuild it.
Inspect the Order Before Shipment
Inspection should take place after trial assembly and before shipment release. For large or high-risk projects, consider an independent inspector.
The inspector should receive:
- Approved drawings.
- Bill of materials.
- Approved samples.
- Graphic files.
- Acceptance criteria.
- Packing requirements.
Require 100% inspection of installation-critical and custom parts, including:
- Custom connectors.
- Screen brackets.
- Doors and locks.
- Graphics.
- Drivers and power supplies.
- Special tools.
- Unique fasteners.
Large quantities of common standard screws may be checked using an agreed counting or sampling method, but the final packed quantity must still include the approved spare amount.
Check:
- Overall width, depth, and height.
- Doors, counters, shelves, and screen positions.
- Graphic fit and alignment.
- Every lightbox and electrical function.
- Locks, feet, cases, wheels, and handles.
- Critical part quantities.
- Final case dimensions and weights.
Define tolerances before production. A graphic channel, door, screen bracket, and transport case should not automatically use the same tolerance.
Record each defect with its part number, photograph, severity, correction, responsible person, deadline, and reinspection result.
- Critical: affects safety or prevents installation.
- Major: affects function, fit, or an important visible area.
- Minor: a limited appearance issue that does not affect use.
Do not accept verbal promises that defects will be fixed after shipment.
Pack the Booth for Installation
Pack the booth by installation zone. Each part code should appear on:
- The part.
- The drawing.
- The bill of materials.
- The packing list.
- The case.
- The installation manual.
The packing list should show:
- Case number.
- Installation zone.
- Part numbers and descriptions.
- Quantity.
- Net and gross weight.
- External dimensions.
- Handling method.
- Critical contents.
Require 100% of cases to have a case number, gross weight, dimensions, destination, and handling mark.
Protect painted surfaces, aluminum edges, acrylic, LEDs, drivers, countertops, graphics, and small hardware. Pack the emergency kit in a case that can be opened first.
The buyer should set a case-weight limit based on the actual handling method. For example, a project may set 30 kg as its own manual-handling limit and require wheels, pallet bases, or forklift openings for heavier cases. This is a project example, not a universal legal limit.
Compare case dimensions with:
- Aircraft or container limits.
- Truck doors.
- Warehouse doors.
- Freight elevators.
- Venue loading doors.
- Hall entrances.
- Forklift capacity.
Solid-wood pallets, crates, and dunnage may need ISPM 15 treatment and marking. Packaging made wholly from processed wood such as plywood or particle board may be exempt because the manufacturing process reduces pest risk.[7] Confirm destination requirements with the freight forwarder before packing.
Prepare Spare Parts
Do not use one fixed spare percentage for every component. Base the quantity on how easily the part is lost, how important it is, and whether it can be purchased locally.
| Part type | Practical starting point |
|---|---|
| Common screws and standard connectors | 3%–5% extra |
| Critical custom connectors | At least 2 spare units per type |
| Locks and hinges | 1–2 spare sets |
| LED drivers or power supplies | At least 1 spare per model |
| Special installation tools | 1 backup set when tool loss would stop setup |
These figures are starting points, not fixed industry rules. Increase the quantity when a part is proprietary, difficult to buy locally, easy to damage, or essential to the complete structure.
The emergency kit should contain:
- Illustrated parts list.
- Part numbers.
- Quantities.
- Basic repair instructions.
- Required tools.
- Supplier contact details.
Choose Incoterms and Freight
Write the Incoterm, named place, and version in the contract. For example:
FCA supplier’s factory, Guangzhou, Incoterms® 2020
Do not write only “FOB China” or “DDP USA.” Incoterms define delivery duties, costs, and risk transfer, but they do not decide payment, ownership, product defects, warranty, installation, or every customs issue.[8]
FCA can be used for several transport modes and often gives the buyer more control when using its own freight forwarder. State whether delivery takes place inside the factory, at the factory gate, at a forwarder’s warehouse, or at a terminal.
FOB is intended for sea or inland-waterway transport. It should not be used automatically for air freight.
CIF and CIP require the seller to arrange freight and insurance, but the risk may transfer before the goods reach the destination. Check the risk-transfer point, insurance value, exclusions, deductible, and claim process.
DAP normally means that the seller delivers the goods to the named destination ready for unloading. The buyer normally handles unloading and import formalities.
DPU requires the seller to unload the goods at the named destination. The U.S. Department of Commerce identifies unloading as the main difference between DAP and DPU.[9]
DDP places broad import duties on the seller. Before accepting it, confirm:
- Who will be the importer of record.
- Who receives customs and tax documents.
- Whether duties and taxes are fully included.
- Whether delivery ends at a warehouse or the venue.
- Whether unloading and material handling are included.
- Who pays customs examination and storage charges.
Choose air freight for small, urgent, or high-value shipments. Ask for the chargeable weight because large, lightweight cases may be charged by volume.
Choose sea freight for larger shipments with enough time for port handling, customs, local transport, and delays.
If the shipment is split, the first shipment should contain a minimum workable booth:
- Main frames.
- Essential connectors.
- Core graphics.
- Basic lighting.
- Tools.
- Instructions.
- Emergency spares.
For reusable booth parts that will be temporarily imported and later re-exported, an ATA Carnet may allow temporary duty-free and tax-free entry in participating markets. It is not normally suitable for goods that will be sold, consumed, or discarded abroad.[10]
Control Payment and Contract Terms
Do not pay the full balance based only on factory photographs.
Link payments to clear results:
- Deposit: signed contract and agreed schedule.
- Drawing milestone: approved technical drawings.
- Production milestone: identified materials and production records.
- Trial-assembly milestone: complete setup and test evidence.
- Final milestone: closed defect list, packing list, case photographs, and shipment release.
The contract should include:
- Buyer and seller legal names.
- Product description and quantity.
- Drawing and revision numbers.
- Bill of materials.
- Material and electrical specifications.
- Price and payment terms.
- Production and delivery deadlines.
- Inspection rights and acceptance criteria.
- Packing standard.
- Incoterm and named place.
- Warranty and defect remedies.
- Change procedure.
- Delay responsibility.
- Intellectual-property terms.
- Dispute terms.
A warranty should define the start date, covered parts, exclusions, normal wear, response time, replacement process, remote support, and who pays replacement freight.
Prepare the Installation Team
Send the installer the final drawings, packing list, case list, assembly manual, electrical plan, tool list, crew plan, spare-parts list, and emergency contacts before the shipment arrives.
Request a video showing the actual booth from case opening to final repacking. It should not be a generic product video.
Before move-in, confirm:
- Installer passes and safety training.
- Lift, forklift, electrician, and rigging bookings.
- Loading-dock access.
- Move-in hours and overtime rules.
- Empty-case storage.
- Waste removal.
- Tool restrictions.
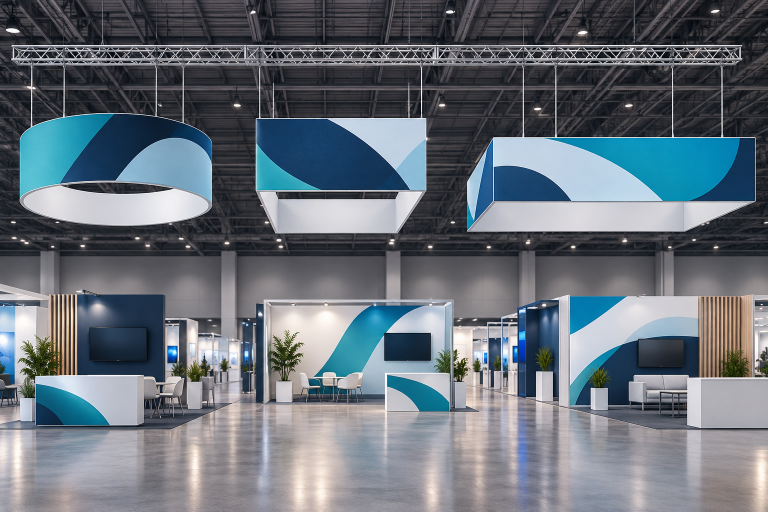
Overhead signs require organizer approval, approved hanging points, and qualified riggers. These requirements should be confirmed before ordering a hanging banner display.
For an integrated LED screen wall, confirm the screen weight, support frame, power load, signal equipment, ventilation, service access, and local technical support before production.
After the event:
- Count all returned parts.
- Record lost and damaged items.
- Record used spare parts.
- Clean and store graphics.
- Test electrical components.
- Repair transport cases.
- Update the bill of materials.
- Order replacements before the next show.
Score the Supplier
| Area | Suggested weight |
|---|---|
| Technical ability | 20% |
| Similar projects | 15% |
| Material clarity | 10% |
| Trial assembly | 10% |
| Quality control | 10% |
| Packaging | 10% |
| Communication | 10% |
| Delivery plan | 5% |
| After-sales support | 5% |
| Price | 5% |
A buyer may use 75 out of 100 as an example shortlist threshold. This is an internal decision level, not an industry standard.
Some requirements should remain pass-or-fail even when the total score is above 75:
- Legal identity verified.
- Bank beneficiary verified.
- Technical drawings accepted.
- Inspection rights accepted.
- Trial assembly accepted.
- Packing plan approved.
Watch for Red Flags
Investigate when a supplier:
- Quotes before reviewing the project information.
- Refuses to provide its Chinese legal name.
- Cannot provide technical drawings.
- Uses only stock project photographs.
- Avoids a live factory call.
- Uses vague material descriptions.
- Promises an unrealistic schedule.
- Refuses trial assembly or independent inspection.
- Cannot provide a bill of materials.
- Sends certificates for different products.
- Changes bank details suddenly.
- Substitutes materials without approval.
- Cannot explain how loads are supported.
- Requests final payment before inspection.
- Has no spare-parts or warranty process.
One issue may have a reasonable explanation. Several unresolved issues normally show weak project control.
Final Checklist
Before production:
- Compare at least three quotations.
- Verify the legal company and bank beneficiary.
- Approve the price, drawings, bill of materials, materials, and graphics.
- Confirm loads, voltage, compliance documents, schedule, Incoterm, and warranty.
- Record 100% of approved changes in writing.
Before shipment:
- Complete 100% trial assembly of the final booth.
- Test all lightboxes, doors, locks, shelves, and screen supports.
- Close the defect list.
- Count all custom and installation-critical parts.
- Approve packing, labels, case dimensions, weights, insurance, and customs documents.
- Send the final installation files to the local team.
After the event:
- Count, clean, test, and repair all returned parts.
- Update the inventory and order replacements.
- Record the actual setup time, problems, and solutions.
- Confirm that the next layout still meets the planned reuse rate.
Conclusion
A reliable Chinese exhibition stand manufacturer should provide an approved drawing set, detailed bill of materials, material samples, complete trial-assembly record, closed defect list, case-by-case packing list, spare-parts kit, and confirmed delivery plan. Compare at least three quotations and review any price that is 15%–20% below similar offers. For reusable stands, measure the percentage of structural parts that can be used again rather than accepting a general “modular” claim. The lowest factory price has little value if missing parts, unsuitable packaging, customs delays, or emergency venue repairs increase the final project cost.