An aircraft-grade aluminum booth is a reusable display system made from aluminum profiles, connectors, base plates, graphics, and accessories. It can be lighter and easier to transport than a steel or timber booth, but the words “aircraft grade” do not prove that the finished booth is strong or safe. Buyers should check the alloy, temper, profile shape, connectors, base design, written load limits, packed size, fire documents, and assembly instructions before ordering.
The figures in this guide include simple calculation examples to help buyers compare different options. They are not universal load ratings. Final wall heights, screen loads, shelf loads, and ballast requirements must come from the supplier for the exact booth layout.
What Is an Aircraft Grade Aluminum Booth?
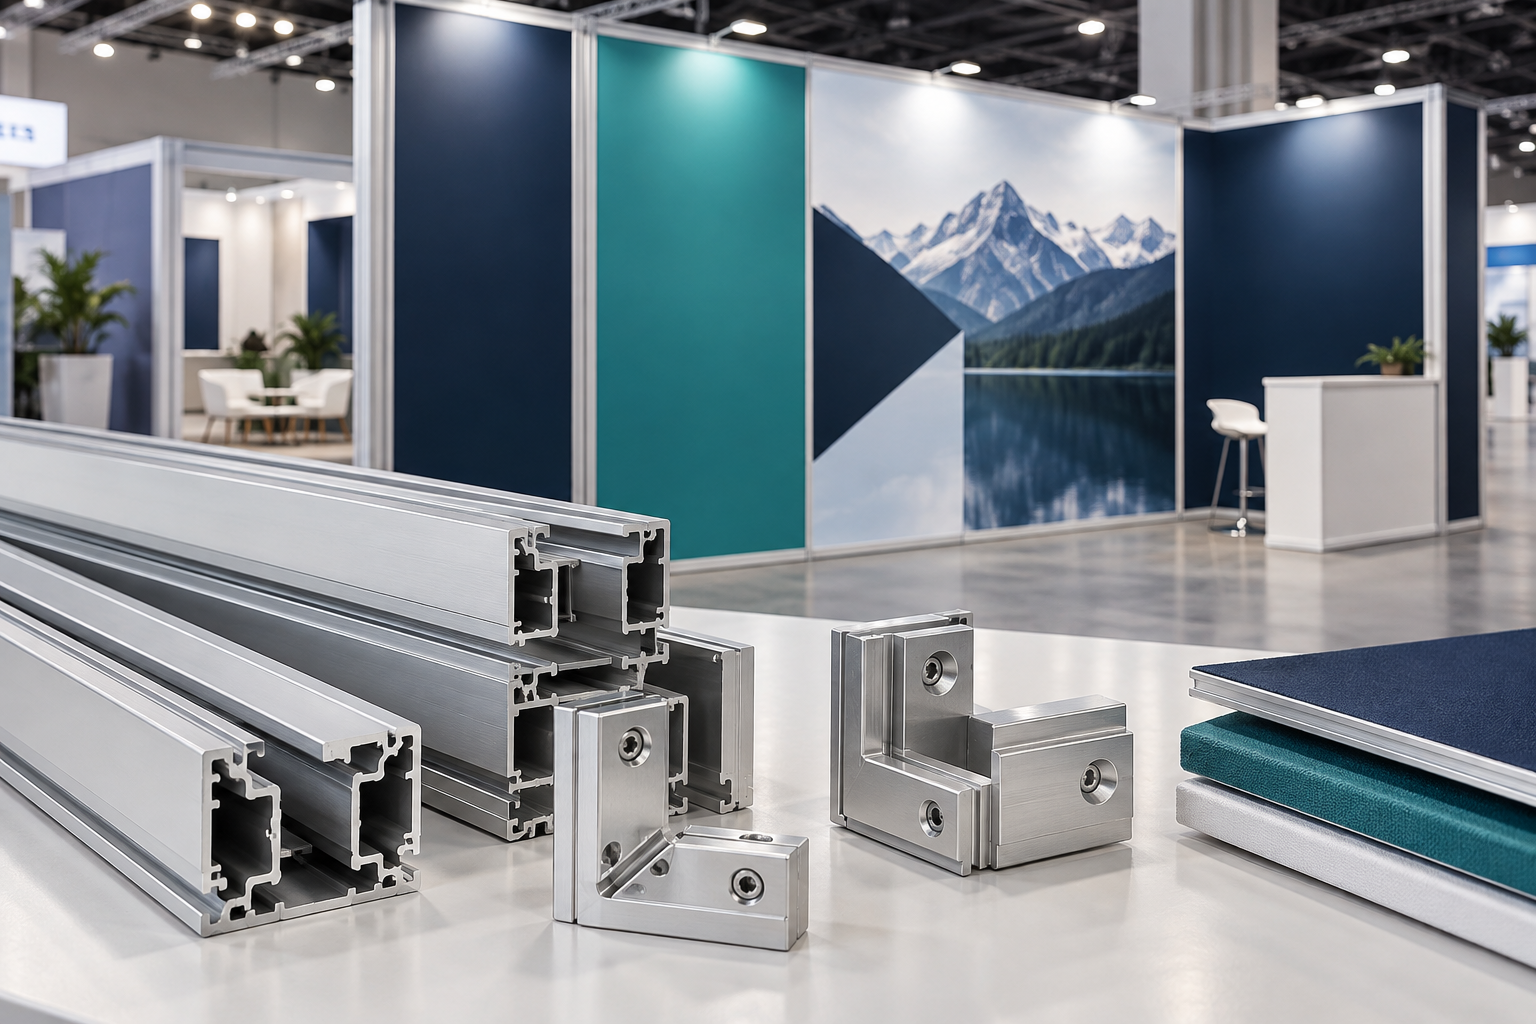
An aircraft-grade aluminum booth normally uses extruded aluminum profiles as its main frame. The profiles are connected on site to build walls, entrances, light boxes, product displays, counters, storage rooms, and signs.
After the event, the booth can be dismantled, packed, stored, and used again. The same parts may rebuild the original booth or create a different layout.
A typical system includes:
- Vertical posts and horizontal beams
- Corner and straight connectors
- Base plates and approved ballast
- SEG fabric or rigid graphic panels
- Monitor and shelf brackets
- LED lights and power supplies
- Counters and storage parts
- Numbered transport cases
An aluminum booth is rarely made entirely from aluminum. Steel base plates, brackets, screws, electrical parts, graphics, cases, and ballast may form a large part of the finished shipment.
Buyers can compare common structures on the aluminum exhibition booth product page or browse more exhibition display solutions.
What Does “Aircraft Grade” Mean?
“Aircraft grade” is not the name of one exact aluminum alloy. Aircraft, buildings, vehicles, and exhibition systems use different alloys because each part needs a different balance of strength, weight, corrosion resistance, surface quality, and ease of manufacturing.
The Aluminum Association maintains the recognized systems used to identify aluminum alloys and tempers. Its standards cover alloy numbers, temper names, chemical composition, mechanical properties, and dimensional tolerances.[1]
Many extruded display profiles are made from the 6000 series. Familiar examples include 6061 and 6063, but the alloy used can vary by manufacturer, profile shape, country, and intended load.
The alloy should normally be listed together with its temper, such as:
- 6061-T6
- 6063-T5
- 6063-T6
The temper describes how the aluminum was processed after forming. It affects strength, hardness, and other properties. A quotation that only says “premium aluminum,” “military grade,” or “aircraft quality” does not give the buyer enough information.
Ask the supplier to provide:
- Alloy and temper
- Profile identification number
- Cross-section drawing
- Nominal wall thickness
- Dimensional tolerances
- Weight per meter
- Material or production batch records
The documents should match the profiles being supplied. A general 6061 or 6063 data sheet does not prove that the delivered booth uses the same material.
How Much Lighter Is Aluminum?
Aluminum has a density of about 2.70 g/cm³. Common carbon steel is about 7.85 g/cm³. When the volume is exactly the same, aluminum weighs about 66% less than steel.
| Material | Approximate Density | Weight for the Same Volume |
|---|---|---|
| Aluminum | 2.70 g/cm³ | 34.4 kg |
| Steel | 7.85 g/cm³ | 100 kg |
This does not mean a complete aluminum booth will always be 66% lighter than a steel booth. Aluminum profiles may use larger sections, and the booth may still contain steel bases, brackets, counters, and ballast.
For a fair comparison, ask for the total packed weight of both systems, not only the weight of the main frame.
Check the Profile Shape, Not Just the Alloy
Two profiles made from the same alloy can carry very different loads. The shape and size of the profile often matter as much as the alloy number.
Check:
- Profile width and depth
- Wall thickness
- Internal ribs
- Open or closed sections
- Connector slots
- Screw channels
- Unsupported length
- Direction in which the profile is installed
A deep beam usually resists bending better in one direction than a shallow beam. However, it may still perform poorly if its walls are too thin, its span is too long, or its joints are weak.
Do not accept a maximum span without the test conditions. The supplier should explain:
- Which profile was tested
- How far it spanned
- How the ends were supported
- Where the load was placed
- Which connectors were used
- How much movement was allowed
A beam approved for a lightweight fabric graphic may not be suitable for a television, projecting shelf, or heavy sign across the same span.
Extruded profiles also have limits for straightness, twist, dimensions, and wall thickness. The Aluminum Association explains how these tolerances are measured and why they matter.[2]
Inspect a production sample for dents, twisting, burrs, sharp edges, poor hole alignment, damaged channels, and loose connectors. A slightly twisted profile can make a tall wall difficult to align.
Check the Connectors
A strong profile is not useful if its joints become loose after repeated use.
Common connection methods include:
- Cam locks
- Bolted plates
- Corner blocks
- Internal expansion locks
- Captive screws
- Pins and clamps
Do not judge a connector only by whether it is metal or plastic. Check what load it carries, how deeply it enters the profile, how it locks, and whether worn parts can be replaced.
Ask:
- Is the connector used only for alignment, or does it carry structural load?
- Does it require a set tightening torque?
- Can it loosen during transport or normal use?
- Can installers overtighten it and damage the profile?
- Can it be replaced without replacing the full beam?
- Will future production batches remain compatible?
Ask the supplier to assemble and dismantle a sample several times. Check whether the joint gap grows, the wall begins to shake, the lock becomes difficult to use, or the profile slot becomes damaged.
For a booth expected to attend 20 events, testing the connection only once does not represent real use. The supplier should explain how repeated assembly was considered when setting the product’s service life.
Check the Base and Wall Stability
Tall walls create turning force at floor level. A booth can use strong aluminum and still tip if the base is too narrow, the ballast is placed incorrectly, or a heavy screen is installed high on the wall.
Stability depends on:
- Wall height and width
- Booth shape
- Base width and weight
- Connected return walls
- Ballast position
- Screen and shelf position
- Graphic surface area
- Floor condition
- Visitor contact
An L-shaped or U-shaped booth may gain support from connected walls. A long, straight freestanding wall usually needs more careful base and ballast planning.
The supplier should provide a base plan showing:
- Base model and dimensions
- Maximum approved wall height
- Required return walls
- Ballast type and amount
- Ballast position
- Approved screen and shelf loads
- Floor or anchoring requirements
Loose weights placed beside a wall are not the same as ballast attached to the structure. Water ballast should be filled to the level set by its manufacturer and fixed so that it cannot slide or leak.
The UK Health and Safety Executive recommends a planned process for the design, assembly, inspection, use, and dismantling of temporary structures.[3]
Do not use an indoor exhibition booth outdoors unless the exact layout, height, graphic type, base, ballast, and weather limits have been approved.
Why Screen Position Matters
Screen weight alone does not show the full load. The distance between the screen and the frame also matters.
For example, assume a screen and bracket weigh 25 kg.
| Distance from Frame | Approximate Turning Force | Change |
|---|---|---|
| 0.4 m | 25 × 9.81 × 0.4 = 98 N·m | Base example |
| 0.6 m | 25 × 9.81 × 0.6 = 147 N·m | About 50% higher |
The screen weight has not changed, but moving it from 0.4 m to 0.6 m from the frame increases the turning force by about 50%.
Give the supplier:
- Screen model and actual weight
- VESA mounting pattern
- Bracket weight
- Mounting height
- Distance from the frame
- Required tilt or rotation
- Cable and media-player weight
- Wall and base layout
An adapter plate may move the screen farther forward. Any change in screen model, bracket, or mounting position should be checked again.
Why Shelf Depth Matters
A shelf becomes harder on the wall and base as it gets deeper.
Assume the shelf and products weigh 30 kg:
| Load Distance from Wall | Approximate Turning Force |
|---|---|
| 0.2 m | 30 × 9.81 × 0.2 = 59 N·m |
| 0.3 m | 30 × 9.81 × 0.3 = 88 N·m |
| 0.4 m | 30 × 9.81 × 0.4 = 118 N·m |
Doubling the distance from 0.2 m to 0.4 m doubles the turning force, even though the product weight stays at 30 kg.
Shelf capacity must apply to the complete system, including the board, brackets, profile slots, wall, base, and load position.
For booths displaying many physical products, an integrated aluminum profile shelving system may be easier to plan than adding shelves to a wall designed only for graphics.
Request written safe working limits for:
- Each monitor bracket
- Each shelf
- Header beams
- Wall-mounted products
- Lighting bars
- Hanging accessories
Choose the Right Graphic System
Most reusable aluminum booths use SEG fabric, rigid panels, or a combination of both.
SEG fabric has a silicone strip sewn around its edge. The strip fits into a channel in the aluminum frame and pulls the fabric smooth.
Main benefits include:
- Low packed volume
- Easy graphic replacement
- Lower risk of cracked panels
- A smooth appearance
- Good use in backlit displays
The fit depends on the finished graphic size, fabric stretch, sewing accuracy, silicone-strip size, and frame dimensions. Ask for the artwork size, visible size, bleed, fabric direction, and sewing instructions.
The guide to interchangeable SEG fabric displays explains how the frame can be kept while the printed fabric is replaced for a new campaign.
Rigid panels can provide a flat surface and may work better for product mounting. However, they use more case space, add weight, and need better edge protection.
A decorative panel should not be treated as structural support unless the complete panel-and-frame system has been designed and approved for that purpose.
Decide Whether You Need Backlighting
A front-lit fabric wall is usually simpler and lighter. A backlit wall can make graphics easier to see in a dark exhibition hall, but it adds LEDs, power supplies, cables, heat, and electrical work.
When comparing a normal fabric display with a lightbox exhibition booth, check:
- LED spacing
- Lightbox depth
- Brightness consistency
- Color-temperature consistency
- Power consumption
- Access to power supplies
- Ventilation
- Replacement LED availability
Visible LED lines, dark corners, and bright spots may be caused by poor LED spacing, the wrong fabric, internal shadows, or a box that is too shallow.
For a simpler non-illuminated display, a tension fabric backdrop booth may reduce electrical work and packed weight.
Measure Installation in Labor-Hours
A claim such as “one-hour installation” does not show how much labor is needed.
| Workers | Time | Total Labor |
|---|---|---|
| 2 workers | 2 hours | 4 labor-hours |
| 4 workers | 1 hour | 4 labor-hours |
Both plans use four labor-hours, but the second plan needs twice as many people on site. Ask for the worker count and total labor-hours, not only the clock time.
Also ask whether the installation time includes:
- Unloading the cases
- Sorting the parts
- Building the frame
- Installing graphics
- Mounting screens and shelves
- Connecting lights
- Routing cables
- Completing the final safety check
“Tool-free” often refers only to the main frame. Screens, shelves, counters, and electrical parts may still require hand tools.
A booth-specific video can reduce assembly mistakes. The DRYPAX assembly case shows how a video made with the customer’s actual components was used to guide installation.
Calculate Packed Volume
Freight cost depends on both weight and package size.
Assume one case measures 1.2 × 0.4 × 0.4 m:
1.2 × 0.4 × 0.4 = 0.192 m³ per case
If the booth uses six cases:
0.192 × 6 = 1.152 m³ total packed volume
Request the following before ordering:
- Frame weight
- Base and ballast weight
- Accessory weight
- Case weight
- Total gross weight
- Total packed volume
- Number of cases
- Longest case
- Heaviest case
Air carriers may compare actual weight with volumetric weight and charge using the higher figure. IATA gives a common air-cargo calculation in which package volume in cubic centimeters is divided by 6,000.[4]
For a case measuring 120 × 40 × 40 cm:
120 × 40 × 40 ÷ 6,000 = 32 kg volumetric weight
If the case actually weighs 20 kg, its chargeable weight may still be 32 kg. Six matching cases would have a total volumetric weight of about 192 kg.
The exact divisor and chargeable-weight rules can vary by carrier and route, so confirm them with the freight provider.
Plan Booth Sizes Before Buying
Do not describe a booth as modular without showing what the same parts can actually build.
| Example Layout | Floor Area | Possible Use |
|---|---|---|
| 3 × 3 m | 9 m² | Small inline booth |
| 3 × 6 m | 18 m² | Corner or inline booth |
| 6 × 6 m | 36 m² | Large island or peninsula booth |
For example, a 6 × 6 m component set may be useful if it can also create one 3 × 6 m booth or two 3 × 3 m booths without replacing most of the frame.
Ask the supplier to prepare drawings and bills of materials for at least two future layouts. Compare:
- Original parts reused
- Original parts left unused
- New parts required
- New graphics required
- Extra cases required
- Expected installation time
Set a Reuse Target
There is no universal reuse percentage for every booth, but a buyer can set an internal target before approving the design.
For example:
- Target 70% to 80% reuse of the original frame and connectors in the next layout
- Keep 2% to 5% spare quantities for small parts that are easy to lose or wear
- Use one matching part number on the component, drawing, packing list, and maintenance record
These are project targets, not industry safety standards. A lower reuse rate may still be reasonable when the next booth is much smaller or has a very different shape.
Also ask:
- Are the profiles proprietary?
- Can connectors be purchased separately?
- Will new parts fit older production batches?
- How long will spare parts remain available?
- Can another printer make replacement graphics?
- Will the buyer receive the final drawings and part codes?
Reuse normally saves more material than replacing a structure and recycling it after only a few events. The U.S. Environmental Protection Agency explains that reducing and reusing products can save materials, energy, and money before recycling becomes necessary.[5]
Inspect the Booth After Every Event
Inspect the booth as soon as it returns from an event. Do not wait until the next installation.
Check:
- Bent or twisted profiles
- Distorted profile ends
- Cracks
- Loose connectors
- Worn screws and locks
- Damaged base plates
- Torn graphics
- Faulty cables and lights
- Broken case wheels
- Missing parts
Do not drill, weld, straighten, or reinforce a structural profile without approval. Replace parts with cracks, permanent bending, torn slots, failed welds, or unknown structural damage.
Keep a short record showing the part number, event date, photograph, damage, repair decision, and replacement date.
Store long profiles horizontally with support at several points. Fabric graphics should be completely dry before packing.
Check Fire Documents
The aluminum frame is only one part of the booth. Fabric, carpet, foam board, plastics, timber, adhesives, and printed panels may all be covered by venue fire rules.
The fire report should match the exact product supplied, including:
- Material name
- Manufacturer
- Composition
- Thickness
- Coating
- Print process
- Test method
- Sample description
A report for unprinted fabric may not cover the final printed graphic. A document accepted by one venue may also be rejected by another.
The Maine Office of State Fire Marshal, for example, requires exhibition materials not to block exits or firefighting equipment and identifies fire-test requirements for fabrics, films, wood, foam products, and other booth materials.[6]
Always check the current exhibitor manual before producing the booth graphics.
Check Electrical Safety
Lighting, screens, media players, and power supplies need a clear electrical plan.
Confirm:
- Venue voltage and frequency
- Plug type
- Total connected load
- Circuit layout
- Cable rating
- Grounding requirements
- Power-supply locations
- Ventilation
- Emergency shutoff access
IEC 60364-7-711:2026 applies to temporary low-voltage electrical installations used for exhibitions, shows, stands, and related entertainment structures.[7]
Cables passing through aluminum channels or holes need protection from sharp edges. Do not trap cables under profiles or base plates.
OSHA notes that flexible cords are more likely to suffer damage than fixed wiring because they are exposed and unsecured. It recommends suitable cord ratings, grounding, strain relief, and regular checks for damage.[8]
Keep Visitor Routes Clear
Base plates, raised flooring, cables, narrow doors, and projecting shelves can make a booth difficult to enter or move through.
Check:
- Entrance width
- Clear walking routes
- Floor-level changes
- Ramp requirements
- Counter access
- Reachable product displays
- Door movement space
- Cable-cover shape
In the United States, an accessible route generally requires at least 36 inches, or 915 mm, of continuous clear width. Limited short sections may reduce to 32 inches under defined conditions.[9]
Local requirements vary, so the venue manual and applicable accessibility rules should be checked for every event.
Calculate the Real Cost per Event
Do not compare the frame-only price of a reusable booth with the complete installed price of a rented or one-time booth. Use the same cost items for both options.
Include:
- Design and engineering
- Frame and connectors
- Graphics and lighting
- Cases
- Freight and venue handling
- Installation and dismantling
- Storage
- Repairs and spare parts
- Future graphic changes
- Extra parts for new layouts
Assume a reusable booth has $40,000 in fixed purchase, graphic, repair, and storage costs. Freight and labor cost another $2,000 per event. A comparable rented or one-time booth costs $8,000 per event.
The approximate break-even point is:
$40,000 ÷ ($8,000 − $2,000) = 6.7 events
Under these example figures, the reusable booth becomes cheaper during the seventh event.
| Number of Events | Reusable Booth Total | Reusable Cost per Event | One-Time Booth Total |
|---|---|---|---|
| 5 | $50,000 | $10,000 | $40,000 |
| 7 | $54,000 | About $7,714 | $56,000 |
| 10 | $60,000 | $6,000 | $80,000 |
| 20 | $80,000 | $4,000 | $160,000 |
These figures are only a calculation example. Real costs change with booth size, freight distance, venue labor, storage, graphic changes, and the percentage of parts reused.
Supplier Buying Checklist
| Area | What to Request | Warning Sign |
|---|---|---|
| Material | Alloy, temper, and matching records | Only says “aircraft grade” |
| Profiles | Cross-sections, wall thickness, and tolerances | No drawings are available |
| Connectors | Purpose, load, locking method, and spare parts | Capacity is given only verbally |
| Stability | Base plan, ballast, and maximum wall height | The same base is used for every layout |
| Loads | Written screen, shelf, and beam limits | No load position or bracket is defined |
| Graphics | Finished sizes and fire documents | The buyer cannot access graphic templates |
| Electrical | Power plan, cable routes, and component documents | Power supplies cannot be reached for service |
| Packing | Case dimensions, gross weights, and packing plan | The supplier does not know the packed size |
| Assembly | Worker count, labor-hours, tools, and trial build | Setup time has no test conditions |
| Reuse | Future layouts and spare-parts policy | Every new layout needs a new frame |
Who Should Buy an Aluminum Booth?
An aluminum booth is usually suitable for companies that:
- Attend several events each year
- Use similar booth sizes
- Change graphics more often than the frame
- Need consistent branding
- Can store and maintain the equipment
- Have predictable transport routes
- Can reuse most parts in future layouts
Rental may be more practical when the company attends only one or two events, has no storage space, faces expensive international freight, or needs a completely different structure at every show.
A one-time custom booth may be more suitable for unusual architectural shapes, heavy suspended elements, or structures that cannot be built efficiently from standard modular parts.
More finished layouts can be viewed in Milin’s exhibition project cases.
Conclusion
An aircraft-grade aluminum booth should be judged by the complete system, not the alloy name. Compare the profile drawing, connectors, base plan, load position, packed volume, fire documents, and trial assembly. A 25 kg screen creates about 98 N·m of turning force at 0.4 m but about 147 N·m at 0.6 m. In the cost example above, a $40,000 fixed investment breaks even against an $8,000 one-time booth at about seven events. The best system is one that has written limits, clear part labels, protected cases, available spare parts, and enough reusable components for future layouts.