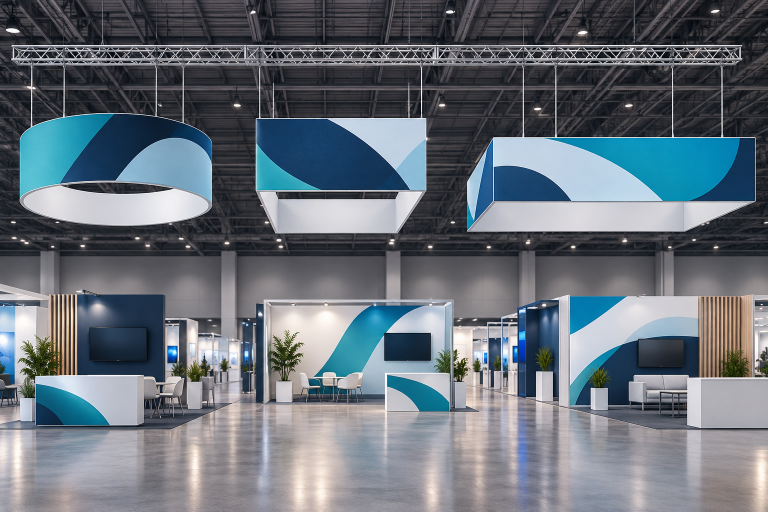
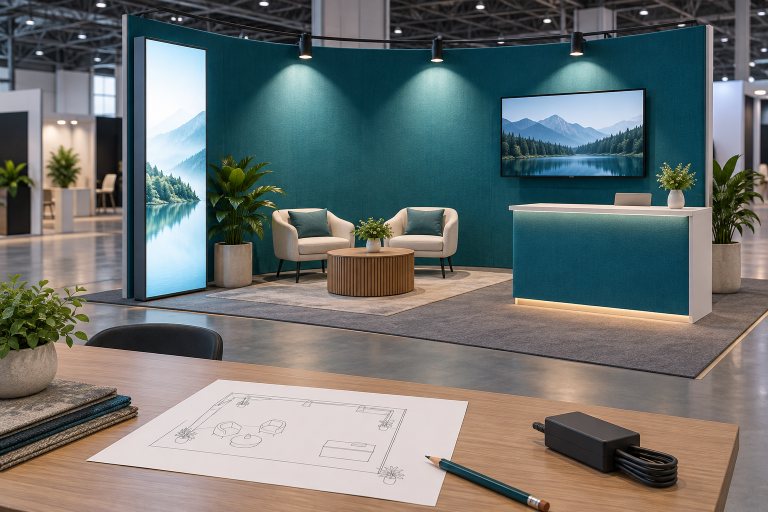
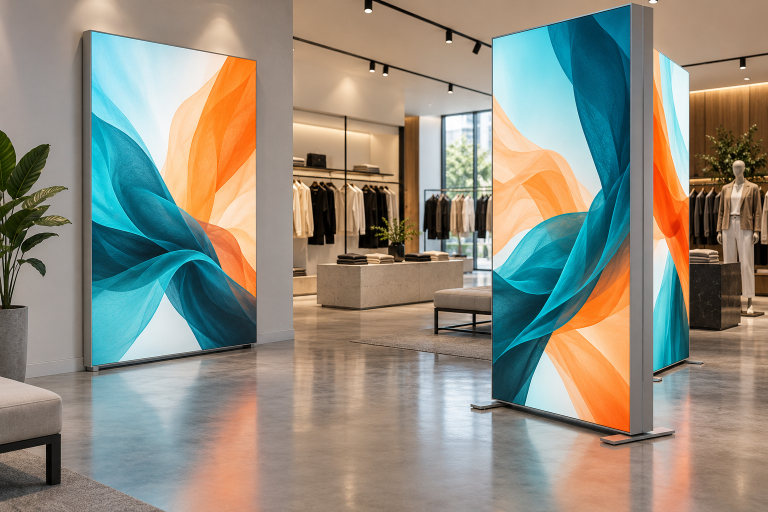
A tension fabric display is popular because it provides a large, smooth printed surface while remaining easier to transport, store, update, and reuse than many rigid display walls. It normally uses a lightweight aluminum frame and a fitted polyester graphic. The frame can stay in use for several events, while the graphic can be replaced when the product, campaign, language, or event changes.
For buyers, the main figures to check are the assembled size, packed case size, case weight, number of installers, full setup time, accessory load, power use, and replacement graphic lead time. These figures are more useful than general claims such as “lightweight,” “fast setup,” or “easy to transport.”
What Is a Tension Fabric Display?
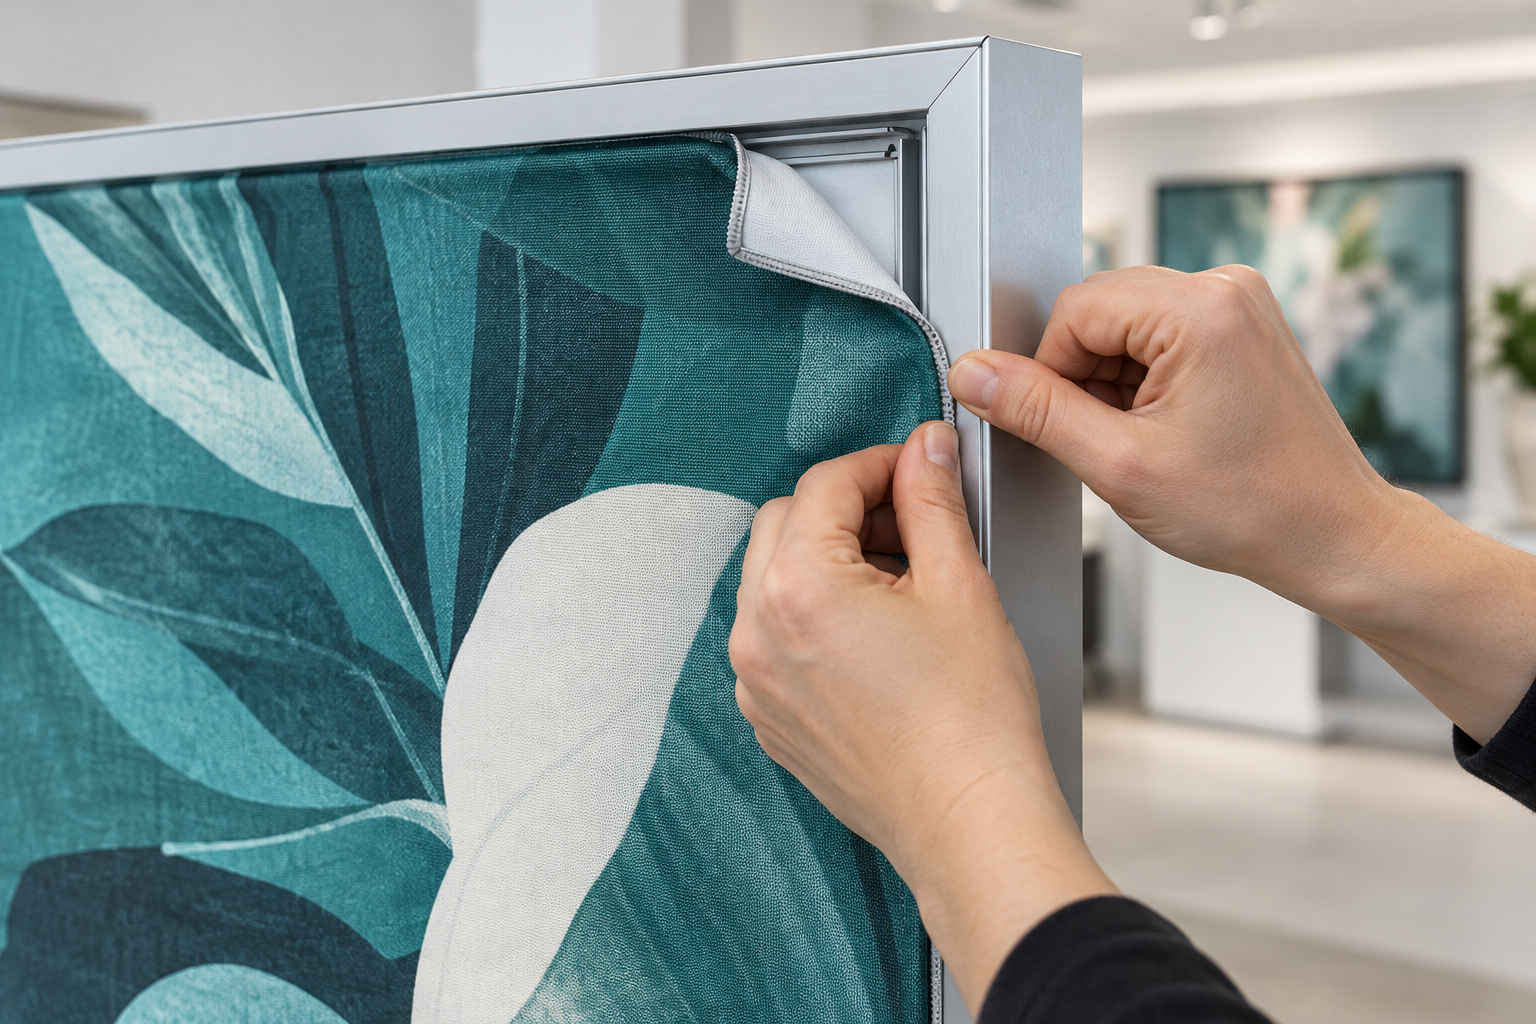
A tension fabric display has two main parts:
- An aluminum frame
- A printed fabric graphic made to fit that frame
The graphic is pulled evenly over or into the frame. This creates a flat surface for logos, product photos, backgrounds, and short marketing messages. It is different from a loose banner because the graphic is cut and finished for a specific frame.
Tension fabric displays can be made as straight walls, curved walls, lightboxes, double-sided dividers, arches, towers, hanging signs, or larger exhibition booths.
Milin’s tension fabric backdrop systems, for example, are listed in custom widths from 3 ft to 65 ft, equal to about 0.9 m to 19.8 m. This range covers small media backdrops, standard trade show walls, and much larger event displays.
Main Types of Tension Fabric Displays
| Display type | How the graphic fits | Typical use | Main point to check |
|---|---|---|---|
| Pillowcase fabric display | The graphic slides over a tubular frame and usually closes with a zipper. | Portable back walls, curved displays, media walls, and event backdrops | The fabric should fit smoothly without bending the frame or placing too much force on the zipper. |
| SEG display | A silicone strip is sewn around the graphic and pressed into channels in an aluminum profile. | Lightboxes, modular booths, retail walls, and larger exhibition displays | The silicone size, sewing position, corners, and finished graphic size must match the frame profile. |
| Hook-and-loop display | The fabric attaches to the frame with hook-and-loop fasteners. | Pop-up displays and simple portable walls | The graphic must be attached evenly to prevent loose edges and diagonal wrinkles. |
A basic tubular backdrop and an illuminated SEG wall are not the same product. A SEG LED lightbox booth also includes LED modules, cables, power supplies, aluminum channels, and a light-diffusing fabric graphic. These extra parts affect weight, setup time, packing, and maintenance.
Why Tension Fabric Displays Are Popular
| Benefit | What it means for the buyer |
|---|---|
| Large continuous graphics | The design is not divided by several visible rigid-panel joints. |
| Lower transport burden | Fabric and aluminum parts are usually easier to handle than large rigid panels or timber walls. |
| Smaller packed size | The frame separates into shorter parts, while the graphic can normally be folded or rolled. |
| Replaceable graphics | The campaign can change without replacing the complete frame. |
| Flexible shapes | Fabric can cover curves, arches, circles, waves, and other custom forms. |
| Optional lighting | Suitable fabric can be used in an LED lightbox to create an illuminated printed wall. |
| Repeat setup | Numbered frame parts and fitted graphics can make repeated installation easier. |
These benefits depend on the complete system. A light frame may still require large feet or braces. A compact case may still be too long for a car or elevator. A reusable frame only saves money when compatible replacement graphics and spare parts remain available.
Buyers who are not sure whether they need a fabric-only wall, a lightbox, or a stronger booth can compare different exhibition display systems before choosing the structure.
Common Booth Sizes
Trade show spaces are often sold in feet, while drawings and production files may use millimeters or meters. The following conversions help with early planning:
| Booth size | Area in square feet | Approximate metric size | Area in square meters |
|---|---|---|---|
| 10 × 10 ft | 100 sq ft | 3.05 × 3.05 m | 9.3 m² |
| 10 × 20 ft | 200 sq ft | 3.05 × 6.10 m | 18.6 m² |
| 20 × 20 ft | 400 sq ft | 6.10 × 6.10 m | 37.2 m² |
| 30 × 30 ft | 900 sq ft | 9.14 × 9.14 m | 83.6 m² |
The booth size is not the same as the display size. A 10 × 20 ft booth may contain one back wall, two side returns, a counter, a storage area, and open visitor space. The final frame dimensions must fit inside the rented booth area and follow the organizer’s height and setback rules.
Large Graphics Without Visible Panel Joints
A rigid exhibition wall often uses several printed boards. Even when the boards are aligned carefully, the joints may cross faces, products, text, or color gradients.
A tension fabric wall can often show one image across a much larger area. It works well for:
- Large product photos
- Lifestyle images
- Wide background scenes
- Large logos
- Short headlines
- Color gradients
The maximum seamless width depends on the supplier’s fabric roll, printer, heat press, and sewing equipment. A large graphic may still require a seam. If a seam is needed, it should be kept away from faces, small text, product edges, and smooth gradients.
Curved displays need an additional visual check. A logo that is centered in a flat artwork file may not look centered after the fabric is placed over a curve. Faces near a strong convex curve may appear stretched, while small text on a concave section may become difficult to read.
For a custom curved wall, request a front view, side view, and three-dimensional booth mock-up before approving the artwork.
Artwork Size and Image Resolution
The supplier’s artwork template should always take priority because it includes the exact visible area, bleed, seams, zipper position, silicone edge, and openings.
As a practical starting point for large-format fabric graphics, ask the printer whether a final resolution of about 100 to 150 pixels per inch at full output size is suitable for the chosen fabric and normal viewing distance. This is not a fixed rule for every printer. Small text, logos, icons, and line drawings should remain in vector format whenever possible.
| Artwork item | Recommended check |
|---|---|
| Photos | Check the resolution at the final printed size, not only at the design-file size. |
| Logos | Use vector files such as AI, EPS, SVG, or print-ready PDF where possible. |
| Small text | Keep it away from seams, zippers, silicone edges, curves, and accessory openings. |
| Brand colors | Approve a printed fabric sample instead of relying only on a monitor. |
| Bleed and safe area | Use the supplier’s template because the required allowance changes by frame and finishing method. |
A full-size output does not need the same pixel density as a brochure viewed from a few inches away. However, increasing a small low-resolution image in the design software does not add real image detail.
Transport Weight and Packing Size
Do not compare only the weight of the bare aluminum frame. Ask for the weight and packed size of the complete working system, including:
- Frame sections
- Fabric graphics
- Feet and support arms
- Lights and power supplies
- Monitor brackets
- Cables and tools
- Protective foam
- Transport cases
Every case should be listed separately as length × width × height and weight. A total weight alone does not show whether one case is too heavy or too long for one person to handle.
| Transport figure | Why it matters |
|---|---|
| Longest packed component | It may not fit inside a normal car, elevator, courier system, or airline baggage limit. |
| Weight of each case | One heavy case may require two people even when the total display is described as lightweight. |
| Number of cases | More cases can increase freight charges and the risk of parts being separated. |
| Dimensional weight | Courier and air-freight charges may be based on box volume rather than actual weight. |
| Internal packing layout | It prevents frame sections, graphics, LEDs, and connectors from damaging one another. |
A good transport case should include fixed spaces or labeled bags for connectors, screws, cables, feet, and power supplies. If the parts only fit in one order, the case should include a packing diagram.
Setup Time and Number of Installers
A realistic setup time starts when the first case is opened and ends after the display has been aligned, powered, checked, and cleared of empty packaging.
Milin currently states that a standard 10 × 20 ft back wall can be assembled by two people in under 30 minutes. This is a product-specific example, not a time guarantee for every tension fabric display. Lightboxes, monitor walls, storage rooms, hanging signs, and multi-module booths require more work.
A full setup test should include:
- Opening the cases
- Sorting and checking the parts
- Building the frame
- Installing feet and braces
- Fitting the fabric graphic
- Installing lights and accessories
- Connecting power
- Checking alignment and stability
- Removing packaging from the booth
The supplier should record both the first-time setup and the trained setup. The first installation is usually slower because the team must identify the parts and learn the correct order.
| Setup data | What the supplier should state |
|---|---|
| Installers | The exact number of people used in the setup test |
| Tools | Every hand tool or power tool required |
| Access equipment | Whether a ladder, platform, or lift is needed |
| First setup time | Time taken by installers who have not used the system before |
| Trained setup time | Time taken after the team understands the system |
| Repacking time | Time required to dismantle, count, protect, and return every part to its case |
Numbered parts and project-specific videos can make a large difference. In one Milin SEG booth setup case, a two-person customer team reported finishing about two hours earlier than planned after watching a video made with their actual booth components. This should be treated as one project example, not a standard result for all booths.
Production and Delivery Time
Production should not begin until the artwork, frame dimensions, accessories, electrical details, and packing plan are approved.
Milin currently lists a standard production time of 5 to 7 business days after artwork approval, followed by an estimated 2 to 4 days for shipping depending on the location and shipping method. Custom structures, large orders, special tests, revisions, or peak-season demand may take longer.
A safer order schedule should include time for:
- Design and quotation
- Three-dimensional booth approval
- Artwork preparation
- Printed color sample approval
- Production
- Test assembly
- Packing
- Shipping and customs clearance
- Delivery to the venue or local warehouse
- A backup period before the event
Do not plan the delivery date to match the first move-in day exactly. A transport delay of even one or two days can become expensive when venue labor and replacement printing must be booked at short notice.
Replacement Graphics
A replacement fabric graphic is normally smaller and easier to ship than a complete new booth. This is useful when a company changes:
- Products
- Campaign messages
- Languages
- Event names
- Distributor details
- Contact information
- Brand colors
Do not order a replacement using only the visible width and height. Keep a production record containing:
- Frame model and version
- Finished graphic size
- Fabric name
- Stretch direction
- Seam type
- Silicone strip size
- Zipper position
- Cable and accessory openings
- Front, back, top, and bottom orientation
- Approved physical color sample
Inspect the old frame before ordering a new graphic. A correctly made reprint may still fit badly if the frame is bent, incomplete, repaired with a different part, or assembled incorrectly.
A reprint may also look different if the fabric, printer, ink, color profile, or heat process changes. When old and new graphics will be installed next to each other, approve a physical sample first.
For more detail, see this guide to interchangeable SEG fabric displays.
Fabric Selection
“Polyester fabric” is not a complete specification. Display fabrics can differ in:
- Weight
- Thickness
- Stretch direction
- Stretch recovery
- Opacity
- Surface texture
- Light diffusion
- Wrinkle recovery
- Cleaning method
- Flame-test result
| Fabric use | Required performance |
|---|---|
| Frontlit wall | Enough opacity and body to reduce shadows and frame show-through |
| Backlit lightbox | Controlled light transmission and diffusion without showing individual LED points |
| Double-sided wall | May require an internal blockout layer to stop one image showing through the other |
| Pillowcase graphic | Suitable stretch, recovery, seam strength, and zipper fit |
| SEG graphic | Stable finished dimensions and a silicone edge that matches the frame channel |
Do not choose fabric by weight alone. A heavier fabric is not always better. It may reduce show-through but could also be harder to tension or less suitable for a lightbox.
Printing and Color Checks
Dye-sublimation transfer printing is widely used for polyester display graphics. The design is printed onto transfer paper and moved into the polyester using heat. The dye enters the textile instead of forming a thick, rigid layer on top of it.[1]
Print quality depends on:
- The original image quality
- Artwork preparation
- Printer calibration
- Ink control
- Fabric selection
- Heat consistency
- Color profile
- Final sewing and finishing
A computer monitor or paper proof cannot show exactly how the final fabric will look. For an important brand color, request a sample printed on the final fabric using the planned production process.
The sample should include:
- Main brand colors
- Skin tones
- Neutral gray
- Small text
- Fine product details
- A smooth gradient
- A large dark area
- A light background
Keep the approved sample for later reprints. A numerical color target is useful, but a physical sample also shows the effect of the actual fabric texture, lighting, and ink coverage.
Sewing and Graphic Fit
A graphic can be printed correctly and still be unusable because of poor sewing.
For a pillowcase graphic, check:
- Whether the seams follow the frame evenly
- Whether the image twists
- Whether the zipper lies flat
- Whether the zipper closes without excessive force
- Whether the bottom edge clears the feet
- Whether openings align with accessories
For an SEG graphic, check:
- Silicone strip size
- Sewing distance from the printed edge
- Corner construction
- Visible border width
- Whether the silicone stays inside the channel
- Whether one edge is much tighter than another
Finished size should be measured in both directions and across the diagonals. Two opposite sides can have the correct length while the finished graphic is still out of square.
Custom graphics should be fitted to the correct frame before shipment. Ask for a full assembled photo showing the front, sides, corners, openings, and lighting.
Backlit Displays and LED Lighting
A fabric lightbox should be tested as one complete system. The result depends on:
- LED spacing
- Distance between the LEDs and fabric
- Frame depth
- Internal reflective surfaces
- Fabric diffusion
- Printed ink coverage
- Power supply quality
- Cable layout
If the LEDs are too far apart, bright points or stripes may appear. If the frame is too shallow, the light may not blend before reaching the fabric. A dense fabric may look dark, while a fabric with poor diffusion may reveal the LEDs or internal frame.
Ask the supplier to provide the following data:
| Lighting data | Why it is needed |
|---|---|
| Total rated power in watts | Helps plan the electrical order and compare complete systems |
| Input voltage | Confirms compatibility with the destination market |
| Frame depth | Affects light mixing, packing size, and wall footprint |
| Number of power supplies | Shows how the lighting is divided and what happens if one unit fails |
| Cable exit position | Prevents cables from crossing visible areas or visitor routes |
| Replacement part model | Allows LEDs and power supplies to be reordered later |
Test the lightbox with the final printed image, not only white fabric. A blank fabric may reveal lighting patterns, but it does not show how dark colors, skin tones, gradients, and brand colors appear.
Check the display from the front, from an angle, at normal visitor distance, and at close range. Test it with the lights both on and off.
Light sources can change the way printed colors appear, so important colors should be approved under lighting close to the final event conditions.[2]
LED lighting can use less energy than many older lighting technologies, but the article or quotation should not promise a fixed percentage saving without comparing actual systems. Power use depends on the LED modules, brightness, drivers, controls, and operating time.[3]
Available illuminated formats can be viewed in Milin’s LED lightbox display range.
Frame Strength and Stability
A lightweight display is not automatically stable. Frame performance depends on:
- Tube size or profile shape
- Wall thickness
- Distance between supports
- Connector design
- Foot dimensions
- Brace position
- Display height and width
- Graphic tension
- Accessory weight and position
After setup, check whether:
- The wall stands straight
- The feet sit flat
- The joints close fully
- The locks work correctly
- The graphic pulls the frame out of shape
- The display moves too much when touched
- The accessories make the wall lean
A monitor changes the center of gravity. Do not accept a general statement that the frame “can hold a screen.” Ask for measurable limits:
- Maximum screen weight in pounds or kilograms
- Maximum screen size
- Approved mounting height
- Required feet or braces
- Approved bracket model
- Restrictions for single-sided and double-sided layouts
Tall or wide walls may also be affected by air movement near doors, loading areas, and ventilation outlets. The risk depends on wall area, direction, base design, structural connections, and installed accessories. It does not increase simply because the graphic is printed on two sides.
Displays that need heavy shelving, doors, storage, or larger monitors may require a stronger aluminum exhibition booth, with fabric used as the printed surface rather than the main load-bearing structure.
Packing, Cleaning, and Wrinkle Control
Fabric graphics should be packed separately from dirty feet, sharp metal edges, loose screws, and power supplies.
After every event:
- Check the frame for bent or missing parts
- Check the graphic for stains and tears
- Allow damp fabric to dry before packing
- Inspect seams, zippers, and silicone edges
- Count all connectors, feet, cables, and tools
- Test lighting parts before storage
Do not assume every polyester graphic can be machine-washed, ironed, steamed, or cleaned with the same product. Follow the supplier’s written instructions. Washing or high heat may change the size, damage the printed surface, affect the silicone edge, or change the tested flame performance.
| Wrinkle pattern | Possible cause |
|---|---|
| Random fold lines | Tight or repeated folding during packing |
| Loose waves across the full wall | The graphic may be too large or may have lost stretch recovery |
| Strong diagonal lines | The frame may be out of square or the graphic may be sewn unevenly |
| One tight corner and one loose corner | The finished graphic may be out of square |
| Zipper is extremely hard to close | The graphic may be too small or the frame may be assembled incorrectly |
Do not solve a repeated fit problem by pulling harder or applying more heat. Check the frame dimensions, assembly order, sewing, and finished graphic size.
Graphic Layout and Viewing Distance
A visitor may only look at a booth wall for a few seconds. The main graphic should quickly answer:
- Who is the company?
- What does it sell?
- Why should the visitor stop?
A practical main-wall layout is one brand name, one product category, one main benefit, and one clear product image. Detailed specifications should be moved to brochures, screens, samples, or product cards.
For many booths, a headline of about 5 to 10 English words is easier to understand than a complete paragraph. This is a design guideline, not a fixed rule.
Treat the lower 30 to 40 inches, equal to about 760 to 1,000 mm, as a possible obstruction zone. Counters, chairs, products, bags, staff, and visitors may cover this part of the wall. This range is a practical planning guide, not a venue standard.
Avoid placing the main logo, headline, product face, or call to action in this lower area unless the full booth mock-up shows that it will remain visible.
A corner booth communicates to two aisles. An island booth may be seen from four directions. A double-sided divider may need a different message on each side. Review the artwork inside the complete booth layout, including counters, monitors, shelves, furniture, and expected staff positions.
Fire, Electrical, and Venue Rules
There is no single set of exhibition rules that applies to every venue. Requirements change by country, organizer, hall, stand size, and structure.
The International Association of Exhibitions and Events publishes display-rule guidance to support more consistent North American exhibition standards, but the actual event manual and venue rules still control the project.[4]
Before production, confirm:
- Maximum display height
- Required setbacks from aisles and neighboring booths
- Flame-performance requirements
- Electrical rules
- Rules for covered or enclosed areas
- Hanging-sign approval
- Required drawings and documents
- Whether official contractors must complete certain work
Do not describe a fabric as completely fireproof. A test report only shows how a specific material performed under a named method and stated test conditions.
NFPA 701 contains fire-test methods for flame propagation of textiles and films. Passing an NFPA 701 test does not automatically mean that every organizer or venue will accept the fabric for every use.[5]
The document should identify the actual fabric being supplied. Confirm:
- Test standard and edition
- Fabric name or identification
- Testing laboratory
- Report date
- Test result or classification
- Whether printing or finishing affects the result
- Whether cleaning or washing affects the result
- Whether the event accepts the document
For illuminated displays, check voltage, plug type, total power, cables, power supply ventilation, and access to connections.
In the United States, OSHA construction rules state that walkways and similar working locations should be kept clear of cords that could create a hazard, and worn or frayed cords should not be used.[6]
Electrical products may also need to meet destination-market requirements. In the European Union, electrical equipment within the stated voltage ranges may fall under Directive 2014/35/EU, commonly called the Low Voltage Directive.[7]
Hanging signs need separate engineering and venue approval. The total hanging load includes the frame, fabric, lights, cables, power supplies, connectors, and rigging hardware. A tension fabric hanging banner should not be installed using the same assumptions as a floor-standing wall.
Real Cost per Event
The first invoice does not show the full cost. Include:
- Frame and first graphic
- Shipping
- Venue handling
- Installation labor
- Storage
- Replacement graphics
- Repair parts
- Lighting parts
- Packaging
- Expected number of uses
Estimated cost per event = total ownership cost ÷ expected number of events
For example, a display with a total purchase, shipping, and storage cost of $6,000 used at 12 events has an initial equipment cost of $500 per event.
If replacement graphics and repairs later add $1,200, the total ownership cost becomes $7,200:
$7,200 ÷ 12 events = $600 per event
This is a calculation example only, not a market quotation.
| Example | System A | System B |
|---|---|---|
| Initial cost | $3,000 | $5,000 |
| Total cost after 10 events | $7,500 | $6,200 |
| Estimated cost per event | $750 | $620 |
A lower purchase price can cost more over time if the display needs extra freight cases, specialist labor, frequent repairs, or complete replacement graphics.
The quotation should state whether it includes one or two graphics, blockout liners, feet, braces, cases, lights, power supplies, cables, brackets, tools, spare parts, test assembly, and delivery.
Milin’s display pricing page can be used for early budget checks, but the final quotation should be based on the complete working specification.
Environmental Claims
A reusable frame and replaceable graphic can reduce the need to discard the complete display when a campaign changes. The U.S. Environmental Protection Agency places source reduction and reuse above recycling in its materials-management hierarchy.[8]
This does not mean every tension fabric display is automatically environmentally friendly. The result depends on:
- How many times the frame is used
- How often the graphics are replaced
- Shipping distance and method
- Packaging volume
- Repair options
- Spare-part availability
- Local recycling services
Broad claims such as “green,” “eco-friendly,” or “fully sustainable” should not be used without clear evidence. The U.S. Federal Trade Commission advises companies to use specific, supported environmental claims instead of broad statements that may mislead buyers.[9]
“The aluminum frame can be reused with replacement graphics” is clearer and easier to verify than saying the complete display is environmentally friendly.
Where Tension Fabric Displays Work Best
Tension fabric displays are a good choice for:
- Trade show back walls
- Conference booths
- Product launches
- Recruitment fairs
- Press walls
- Corporate events
- Retail promotions
- Shopping mall displays
- Showroom graphics
- Indoor lightboxes
- Temporary branded spaces
They need extra planning when the display is:
- Very tall or wide
- Double-sided
- Backlit
- Fitted with monitors
- Used in several layouts
- Suspended from the ceiling
A fabric display is usually not the best main structure for:
- Heavy product shelves
- Locked storage
- Permanent hard walls
- Outdoor wind exposure
- Structural doors and enclosed rooms
- Areas where visitors regularly lean against the wall
In these cases, use a stronger rigid or modular frame to carry the load, while the fabric remains the printed surface.
Buying Checklist
| Area | Data to confirm before ordering |
|---|---|
| Structure | Assembled width, height, depth, frame profile, feet, braces, approved layouts, and accessory load |
| Graphic | Fabric name, use type, printing method, finished size, sewing, silicone or zipper details, and replacement price |
| Lighting | Frame depth, total watts, voltage, plug type, cable position, power supplies, and replacement parts |
| Transport | Number of cases, dimensions and weight of every case, longest part, internal protection, and packing diagram |
| Installation | Number of installers, tools, access equipment, first setup time, trained setup time, and repacking time |
| Delivery | Artwork deadline, production time, test-assembly date, shipping method, and delivery date |
| Safety | Venue rules, flame-test document, electrical requirements, hanging approval, and required contractors |
| Support | Warranty, spare parts, reprint lead time, color matching, repair options, and technical support |
The complete display should be assembled before shipment. Confirm that the wall stands straight, the graphic faces the correct direction, the corners fit, accessory openings align, lights work evenly, cables follow the correct route, and every part fits back into its case.
Conclusion
Tension fabric displays are popular because one reusable frame can provide a large printed surface without the packing volume of many rigid walls. Before ordering, collect at least eight figures: assembled size, case dimensions, case weight, installer count, setup time, accessory load, lighting power, and replacement graphic lead time. For reference, a 10 × 20 ft booth covers 200 sq ft, or about 18.6 m², and Milin states that a standard back wall of this size can be assembled by two people in under 30 minutes. Product-specific data, a full test assembly, and correct venue documents are more valuable than general claims such as lightweight, fast, or reusable.